Clark Kent Creations -- Swarthmore, PA. Landscape Design and Construction, Hardscaping, Patios
  • Home
  • Services/Photos
    • Hardscaping >
      • A Flagstone Walkway -- The Process
      • Stone Steps -- The Process
    • Wood Fences
    • Exterior Carpentry
  • About
  • Community

Fear, Courage, and New Beginnings

1/3/2014

12 Comments

 
Picture
The new year always serves as a convenient opportunity to assess the past year, reflect on successes and failures, and prepare for what lies ahead.  It’s a time of optimism, a time for fresh starts, and a starting point for moving forward.

Amidst all the leftover Holiday treats, football games, and catching up with old friends, I personally have spent a fair amount of time this week reflecting on the past year.  A few years’ back I made the resolution never to make another new year’s resolution – my thoughts being that most resolutions are too narrow, too short-sighted, and often reflect an effect of larger problems, not the cause.

So my thoughts this past week have focused on what some of the underlying trouble-spots are with me as a person.  Thankfully, nothing major, but certainly there are areas where I, like nearly everybody, can improve as a person.

And as I’ve assessed my areas for improvement, I’ve discovered one underlying theme – fear.  More specifically, overcoming fear to be a success. Being brave to be happy.

Which in turn led me to another thought process – if courage is the ability to overcome fear, then what is the difference between courage and recklessness?  Between strength and being self-destructive?

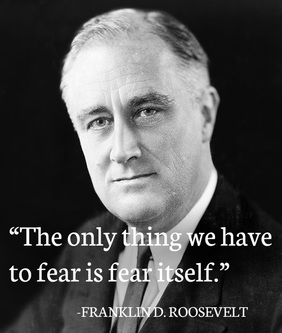
Mark Twain once said that “Courage is the resistance to fear, the mastery of it, not the absence of it.”  And I think in that quote lies the answer.  Recklessness has more to do with a lack or inability to understand the negative effects of an action, whereas courage is understanding and accepting it.  It’s a fine line indeed, but it shifts the concept to one that is much more cognitive, to one which can be rationally evaluated.

My personal fears most likely aren’t that different from many others’ fears.  Fear of failure, fear of rejection, fear of being judged, fear of change, to name a few.

And to analyze those fears, I need to evaluate the negative consequences in order to conquer them.  And in doing so, I’ve come to realize that the negative consequences I’ve been fearing are much more manageable than I’ve been making them out to be.

So in perhaps my first cathartic actions of the new year, I’m taking this opportunity to announce a few changes in my personal and professional life. 

I’ve begun taking classes for my Pennsylvania Teacher Certification.  This is a decision I’ve been mulling over for some time, but one which I believe will serve to increase my own happiness and the well-being of my family in the years ahead.

Not to say it will be an easy road.  The good things in life generally aren’t.  But it is a decision that I honestly believe will serve me best in the years ahead.

In addition to a post-baccalaureate courseload, I will also have student teaching assignments and perhaps even some substitute teaching assignments to gain experience and get my foot in the door towards my eventual new career.  All while continuing to juggle family responsibilities.

So what does this mean for Clark Kent Creations?  What does it mean for my hardscaping career?  Well, probably not too much for the immediate future.  At least on the surface.

But changes do lay ahead.  My website will remain the same, my weekly blogs will continue with no noticeable changes for the foreseeable future.

And to clients who already have quotes and signed contracts for spring projects, I’ll still be providing the same level of professional service you’ve come to expect.

I’ll still be taking on new projects, still be providing new estimates, still be just as responsive as ever to past clients and still take just as much pride in my projects as always.

But in continuing with my conquering fear theme of the new year, new clients and prospects may find that I’m not afraid to say “no thanks” to projects that aren’t in my sweet spot of services. 

Hopefully I can still secure a few large patio projects for the summer months, but during the school year I’ll be focusing on smaller to medium size projects – ones that I can complete without a full staff, quickly, leanly, and efficiently.

I may pass on some larger projects, or at least ask that they can be scheduled once we complete the school year.

I may ask for a bit more time to complete projects, as I balance studenting, teaching, and parenting in conjunction with work.

And while I realize there may be some lost business with this approach, this goes hand-in-hand with my confronting of fear, of accepting the consequences of an action in an act of courage.  I think it’s for the best.

I’m on my way to becoming a teacher.  And that is certainly nothing to be afraid of.  It’s a change I’m embracing.  And while fear certainly isn’t absent from this change, it’s a fear that I’m proud to confront.

And so the new year begins.  Happy New Year everybody!


12 Comments

Another Hardscaping Season in the Books -- 2013 Recap

12/20/2013

1 Comment

 
PictureA Warm Sunny Rose, to Get You Through the Winter
And just like that, we close the door on the 2013 season.  Like it or not, winter has showed up and moved in – time to put the tools away until next spring, and spend some quality Holiday time with family and friends.

Hard to believe, but it was less than two weeks ago that we were drysetting a flagstone walkway in nearly 60-degree weather.  But these past two weeks have served as a vivid reminder as to why we don’t schedule hardscaping projects during the winter months.  As I write this it is flurrying lightly outside – the fourth snowstorm in just over 10 days.  And while this one doesn’t appear to have quite the punch as a few of the other storms, there’s still a significant amount of snow on the ground thanks to the storms and a steady supply of sub-freezing temperatures.  Certainly not ideal hardscaping weather. (Editorial Note:  Warm weather has returned -- at least temporarily.  Volatility goes hand in hand with the season).

Thankfully, that dryset walkway project was the last of the hardscaping projects on the calendar for this year.  We still have a few smaller carpentry projects we’re trying to squeeze in between the snows, but for the most part we’re ready to close the door on the season.

And I’d like to personally take this opportunity to throw a few “thank you”s around.

First and foremost, I’d like to thank all of our loyal clients for their continued business over the years.  It sounds cliché, but without the clients none of what we do would be possible.  Your business is more than appreciated.

Secondly, I’d like to thank all of our loyal vendors.  Your inventory, service, pricing, research, special orders, and overall professionalism is a valued asset to our business. 

And of course, I need to thank my workers who have helped make it all possible over the course of the season.  Russ, Bryan, Bill, and Jason – thank you!  I know it’s not always easy work, but each of you have stepped up and contributed to the ultimate success of our projects.  Your hard work is appreciated.

This will be the final blog post for the year, as I take next week off from my blogging duties to celebrate the season.  But I will be back come January with more informative posts.

And I’d also like to take this opportunity to remind everybody that even though winter is here, it doesn’t mean we can’t start thinking about next spring.  In fact, with the way winter is looking already, it may be just what we need to get through the winter.  Start the planning process, and we’ll be ready to go with your project come the first of the spring thaw.

And don’t forget – we’re also available for light handyman work, hauling and clean-outs over the winter months.  And don’t be afraid to ask about those weird “not sure who to ask” projects.  You never know, we just may be the ones to take it on during the winter months.

And with that, I’ll offer one final thought for the 2013 season – “He sprang to his sleigh, to his team gave a whistle, and away they all flew like the down of a thistle.  But I heard him exclaim, ‘ere he drove out of sight,  "HAPPY CHRISTMAS TO ALL, AND TO ALL A GOOD-NIGHT!"  (And Happy New Year’s too!)

1 Comment

Do I Need to Shovel the Snow off my Deck?  Winter Deck Maintenance Tips

12/13/2013

6 Comments

 
PictureA Wintertime Deck: What to Do?
No matter where you live in the United States, this past week provided an early glimpse of the winter weather that lay ahead this year.  Major snowstorms and sub-freezing temperatures have extended all the way across the country, including many areas in the deep south that just aren't used to it.

Here in the Philadelphia area, we got belted with an unexpected 8" of snow this past Sunday (which made for a real fun Eagles game to watch!), another 4" on Tuesday, followed by a blast of bitter Arctic air.  And more snow and "wintry mix" is in the forecast for this coming weekend.

I've posted on this site in the past about how to care for your hardscaping during the winter months, but many of our decking customers may be wondering what the best ways are to deal with ice and snow on your new deck.  Here's a few helpful hints.

First of all, don't worry about the weight of the snow on the deck.  It's not going to fall down.  Remember those building permits we had to file in advance of building the deck?  That was to ensure the structural specifications can handle the weight -- regardless of whether it's a cocktail party in the summer with 40 people, or 2' of snow falling on it in the winter.  In fact, snow is what's called a "dead load", meaning it's stationary and not adding extra force by jumping or moving around.  I know our decks will be just fine.  In fact any deck that went through the proper permitting procedure, regardless of whether we built it or somebody else built it, will be just fine.

Another concern I hear voiced often is whether or not the ice and snow will damage the deck.  Simple answer here: no.  Your deck was built with materials that are meant to hold up to the elements, regardless of whether it's heavy rain, freezing temperatures, or snowdrifts.  Composite materials, pressure-treated lumber, red cedar -- they're all meant to be exposed to the elements.  If they weren't, then we wouldn't be building decks with them. 

That being said, various materials will behave differently in reaction to ice and snow.  Vinyls or composites may shrink slightly in sub-freezing temperatures.  But no worries, as they will just as quickly expand back once the temperatures rebound.  Pressure-treated lumber is about as maintenance free as it gets.  Cedar or other non-treated lumbers should be sealed or treated regularly to help keep out the moisture.  But assuming you're keeping up with the routine maintenance, then a few big blizzards should be nothing to worry about.

As a deck owner, your biggest winter-time concern should be keeping any high traffic areas clear of ice and snow, and maintaining a safe, slip-free traffic path.  And there are a few things to keep in mind when doing this.

First of all, the best thing you can do with your deck is just leave it alone while the snow sits there, slowly melting and clearing itself.  The deck will still be there come March, no need to mess with it in the mean time.

But that's not always realistic.  Oftentimes the rear entrance leads right out to the deck, with a set of steps leading down to the driveway.  It's how you get in to the house when you park in the driveway, it's where you take out the trash, it's how the kids get in the house after a day of sledding in the backyard.  So shutting it down just isn't practical.

In these instances, shoveling the traffic areas is the best thing you can do.  When shoveling, it's best to use a softer, plastic or rubber-bladed shovel that won't scuff up the deck surface.  Metal shovels are great on asphalt driveways, but can really tear up a wood or composite deck in no time.  If it means spending an extra $15 on a designated "deck" shovel, so be it.  It'll eliminate big-time repair costs down the road.  Even a push-broom will work fine in these situations too.

It's also important to shovel "with the grain".  Run your shovel right down the length of the boards, not across the boards.  Running the shovel across the boards is just asking to catch or scuff up a board unnecessarily.  A gentle, long shovel stroke will clear the boards easily without risking getting the shovel caught or stuck on a board.

And even a well-shoveled area can still get slippery, especially when it comes to composites.  I will repeat my wintertime mantra here:  "Rock Salt Bad".  Just like in hardscaping, rock salt will eat away at the deck, drying out wood, staining composites, or even scraping up the surface. 

If slipperyness is a major concern, what you may want to consider, especially in high traffic paths on your deck or steps, is to install some rubber "grip strips" to help with your footing.  Even a single strip on each step tread will add considerable safety to any potentially slippery surface.  And while the strips aren't the most aesthetic add-on in the world, they do come in a few assorted colors to help conceal them, and just a few strips in key strategic locations can add loads of safety to icy surfaces.  It's something at least considering if slip-and-fall is a concern.

And if you don't have a deck, but are considering having one built down the road?  Give us a call for a free consultation.  We'll be happy to take a look -- once all this snow melts that is ...  Happy Winter!

6 Comments

A Dryset Flagstone Walkway Project.  And a Cautionary Tale About Hardscaping and Stump Removal

12/6/2013

6 Comments

 
PictureAn English Cottage Walkway -- The Finished Product
A few months back I got a call from woman who was quite excited.  "We finally had the giant Silver Maple in the backyard removed!," she exclaimed.  "Now we can move forward with the patio I've always been wanting!"

I hate being the guy to squelch anybody's enthusiasm, especially when it comes to a nice size patio project, but unfortunately things aren't always that simple.  My first site visit confirmed my suspicions.

I never saw the tree while it was standing, but based on the woman's description and the enormous crater just off the back of the house, it must have been massive.  What I saw was a crater approximately 10-15' in diameter, with a depth of at least 2' where the stump had been ground out.  The center of the crater was filled with woodchips from the grinding process, and the perimeter of the crater showed the remains of the root system, with a network of large 6"+ roots spidering out from the center of the crater.

"I hate being the bearer of bad news," I told the woman, "but I have some serious reservations about putting in a patio this soon after the tree was removed."  The problem is that all those woodchips and all the remaining root system will soon begin decomposing.  And as it decomposes, the area will settle.  And no matter how much gravel is put in, no matter how well its compacted, it will soon settle once again, wreaking havoc on the patio.

That decomposing/settling process can take years to complete.

So what's a person to do? 

In most cases when a tree this size is removed, it's in an area far from the house.  Planting another tree in the spot is often the easiest and best solution.  Or turning the area into a garden can work great as well.

The problem in this case was that the tree was originally planted much too close to the house.  The crater was literally right outside the back door.  We certainly couldn't just leave a muddy crater there.

Picture
In Progress
Picture
And the Finished Product
We decided to go ahead with a simple dryset walkway -- one that could serve a functional purpose now, and one that could be lifted and reset as the area settles.  Additionally, we elected to keep all the stones in their full rectangular shapes with no cuts.  That will allow the stones to be reused in additional functions down the road once enough time has passed and the area is ready for a full patio.

But for now we excavated the woodchip/soil/root footprint as best as we could, compacted approximately 8" of crushed gravel, screeded a thin layer of sand, and set the 1.5" thick bluestones atop the sand.  A very typical dryset installation.  How long will it last before some settling occurs?  Tough to say for sure, but my guess is we'll most likely need to do a little bit of resetting in the next two years or so. 

But with the dryset technique we used, any future maintenance or repairs will be minor, and the stones can be used again without incurring additional material costs.  And the client gets a great walkway in the mean time.  Not a bad compromise. 

Quick.  Simple.  Effective.  And expert advice too, if I do say so myself.  Got a problem area in your yard that you're looking to do something with?  Give us a call, and let us know what we can do for you!
6 Comments

Patio Construction in Delaware County, PA

11/29/2013

2 Comments

 
PictureDryset PA Blue Flagstone
A quick, picture-heavy post this week as we break for the Thanksgiving Holiday and spend some quality time with loved ones and friends.

Just a reminder that as we approach the end of the 2013 season, it doesn't mean you have to put your outdoor plans on hold until the spring.  The winter months are a great time to spend planning and thinking about next spring's projects.  Spend the prep time now,and you'll be ready to hit the ground running come the return of warm weather and longer days next spring.

We service all of Delaware County, PA and parts of The Main Line and West Chester.  Whether its natural flagstone, manmade pavers, clay brick or concrete, we are experienced in all hardscaping mediums.

Here's a few pictures of some various patio projects we've done over the past few years -- hopefully they can serve as some inspiration!

Picture
EP Henry Pewter Blend Pavers with Natural Stone Steppers
Picture
Wetset Irregular Flagstone, Blended Mix
Picture
Wetset Brick, Herringbone Pattern
Picture
Inset Chess Board, Red and Black Slate
Picture
Wetset PA Gray Flagstone, Irregular Shape
Picture
EP Henry Coventry Pavers, Harvest Blend
Picture
Dryset PA Gray Flagstone, Linear Shapes
Picture
Dryset Flagstones with Natural Stone Steppers
PictureWetset Flagstone, Linear Shapes
And keep in mind, consultations are always free!  No matter what type of outdoor living space you're thinking about -- flagstone, pavers, wet or dry set, a new deck -- you name it, Clark Kent Creations is here to help!

A new outdoor living space might be just the ticket for that perfect Christmas gift you've been trying to think of too!

Give us a call and lets get that ball rolling for next spring.

2 Comments

Stonework, Screwguns, and Gardens -- 21 Things I'm Thankful for this Thanksgiving

11/22/2013

2 Comments

 
PictureI'm Thankful for the Simpsons Too
With Thanksgiving here this week (can you hardly believe it?!), I thought I'd take a moment to reflect on the things I'm thankful for -- both from a professional point-of-view and on a personal level.
 
Apologies in advance for all the things I'm leaving off.

So here it is -- 21 things I'm thankful for ...

1.  My Family -- Both my immediate family and my extended family.  I could probably draft a larger list listing each of my family members by name, and highlighting how they add to my life, but for the purposes of this list, we'll list them as one.  You know how much each and every one of you mean to me.

2.  My Friends --  I've been tight with some of you since we were young 'uns, others I've picked up along the way, and still others I've known just a few years -- but regardless of how long I've known you, I always enjoy sharing a laugh, and knowing we're there for each other.

3.  My Health --  Definitely getting to that age where I can't take this one for granted anymore.  Every healthy, active day is a blessing.

4.  Beautiful Stonework.  OK, so it's part of what I do, but the more I work with stone, the more I appreciate the true masterpieces, and am humbled by what the masters can do.  This is truly an art form that one could spend a lifetime attempting to master.  I'm thankful to live in an area where there is so much beautiful stonework to admire on a daily basis.

5.  My Employees -- past and present.  All the projects we've done over the years, all the project pictures you see on this website -- your blood, sweat and tears are part of those projects.  (Thankfully not too much blood).  Thank you.

6.  Cordless drills/screwguns.  We build a fair amount of fences and decks.  I can't even begin to imagine how this was done with a simple hammer and nails.  Really makes you appreciate what was accomplished in the old days.

7.  Swarthmore.  Many of you familiar with "The Swat" know what I'm talking about, but for those not familiar with it you really have to experience it to believe it.  Great people, natural beauty, great architecture, a safe walkable/bikeable community, great schools, and great activity resources.

8.  A Sense of Humor.  When times are stressful or down, sometimes a good, intelligent laugh is the best cure.

9.  Hawaiian shirts.  What can I say?  I like 'em.  They're fun.

10.  My Clients.  While we are a providing a service for you, you are the ones who make it all possible.  I've met some really great people over the years, who have made my life richer.

11.  Hikes in the Woods.  One always finds something new and interesting, often when not actively searching.  Sometimes you hit the ground running, other days it's all you can do to get motivated.  But I always feel great when I'm done.  And better off for it.

12.  Music.  The soundtrack of life.  Can't possibly imagine life without it.

13.  The Internet Community.  So as much as I grumble about the "internet-ization" of society, proliferation of ID passwords, and the lack of real social interaction (all very valid complaints, I might add), there are some amazing resources out there, available with just the click of a button.  Whether it's sourcing materials, searching for pictures and information, or sharing information via forums, the internet can be a great thing.  And for my forum friends (you know who you are), I can't thank you enough for all the information and feedback you've provided over the years.  Hopefully I reciprocate as much as I take away.  I try.

14.  My Supplier Network -- There's a number of suppliers who I rely on consistently to provide quality materials and services, but I owe a special shout-out to Galantino Supply Company -- always helpful, always friendly, and always glad to help with the highest level of professionalism.

15.  Slider-Flip-flops.  You know when you're lounging around at home in your socks, and you realize you need to run out for a quick errand, but you don't feel like dealing with shoelaces?  And since old-school flip-flops have that annoying prongy thing next to the big toe, you can't wear them with socks, at least not comfortably.  Love my slider flip flops.  I'll throw my cowboy boots into this category too, for when it's even colder or wet.

16.  The Arts.  Whether it's fine painting, beautiful architecture, drama, music, or dance, art is the decoration of life that makes you appreciate it.  Take away the arts, and there's not much left.

17.  Teachers.  Being married to one, I see firsthand the dedication involved to helping young citizens grow and become their best.  And I can certainly think back on a number of teachers who have had a dramatic impact on my life.

18.  A Healthy Planet.  But one we must respect.  There's a lot of talk being thrown around about the earth's problems and man's impact, but in the here and now it's amazing what Mother Earth provides for us.  I can only hope that the Earth we know and love will remain relatively the same for at least my children and my children's children's lives. 

19.  Gardens.  Man's interaction and interpretation of nature.  Whether it's a formal English garden, interactive children's garden, Japanese meditation garden, an urban rooftop -- the list could be endless -- it always amazes me what can be created when man patiently tends to and cultivates a piece of the planet.

20.  Good Food and Drink.  Creating good food is an art form unto itself, and definitely worthy of our appreciation.  Whether it's formal culinary arts, informal roadside barbecue, small-batch brewing, or wine-making, how can you not appreciate this one.  Especially now at Thanksgiving time?

21.  A Peaceful Soul.  Some days more than others.  But I always sleep easily at night knowing that I've done what I do to the best of my ability, been honest with myself and others, and looked out for the interests of everyone around me as best as I can.  You can't ask anything more of anybody than that.

I sincerely wish everybody a healthy and happy Thanksgiving.  Wishing you a long list of things you can be thankful for.


2 Comments

Dry Set vs. Wet Set Hardscaping.  Which One is Right For You?

11/15/2013

8 Comments

 
PictureWet-Set Installation in Progress
** Editors Note -- The following is a reposted article from part of a larger hardscaping series we ran last year.  But it is perhaps one of the most commonly asked questions during the sales cycle.  Certainly worth revisiting.

As I've stated in the past, there are a lot of decisions that need to be made in conjunction with planning for a new outdoor living space.  This week I’d like to discuss the differences between a wet-set installation and a dry-set installation, and the advantages and disadvantages of each.

First, a quick lesson.  Hardscaping projects generally fall into one of two basic categories; Wet Set or Dry Set.  While there are a lot of options to consider when selecting materials, no matter what material you choose they will be set using one of these two techniques. Wet set refers to setting the materials in a bed of mortar.  (The mortar was mixed and was wet when we set the stones, get it?)  Dry set refers to setting the stones atop a bed of compacted crushed gravel and sand.  No mortar, no concrete, thus the “dry” label.

In either case, the process begins with excavating out the footprint a minimum of 8”.  What happens from there depends on the technique.

A wet set application includes a base layer of gravel to separate the native soil from the new install.  Forms are then set at the necessary grade along the perimeter of the new install, be it a path, patio, or combination of the two.  A 4” thick rebar-reinforced concrete pad is then installed to serve as the base.  This pad is typically rough-finished, as the finish will be concealed by the eventual installation of the flagstone.  The grade of the concrete should be approximately 2” below the desired finish grade, to accommodate the flagstone and mortar thickness.

Once the concrete has set, the perimeter forms are removed and flagstones can begin being mortared to the surface.  When all is said and done, you will have a solid, rigid, impermeable surface.  It is long lasting and durable, however it can be more difficult and/or costly to repair or reset if necessary.  The technique is also subject to any impermeable surface requirements that many municipalities are requiring for stormwater management purposes.

On the other hand, a dry set application includes approximately 6” of compacted crushed gravel as the base, in lieu of a concrete foundation.  Once the base gravel has been compacted (typically compacted in a series of three-inch lifts), a thin layer of sand is spread evenly across the gravel base. Flagstones are then set atop the sand bed, allowing for a slightly permeable installation that offers some degree of flexibility.  We typically use thicker heavier stones on dryset installations, as the weight of the stones offers strength and weight to hold the stones in place.

PictureDry-Set Installation with "Butt" Joints
Because of the flexible nature of the installation, dry set installations are less likely to crack, and can be easily lifted and re-set if necessary.  The flexible nature is slightly more prone to frost heaving and settling however.

As for costs, typically the dry set technique runs about $5 to $6 cheaper a square foot then the wet set technique, assuming the stone selection is comparable.

So again the question becomes which one is right for you, and again the answer is that it depends on your personal taste (I’m not going to make all the decisions for you, you know!).  I can tell you that we don’t do too many irregular shaped dryset installations, mostly due to the wider joint widths and the potential of joint material washing out.  But we have done them, and we can address the joint material issue as well if that’s where your heart truly rests.  Linear designs lend themselves quite nicely to either dry or wet set applications, and you do have the option of “butt” joints (meaning near-zero joint widths) on the dry-set option as well.  

If you'd like to discuss which application is right for your project, just give us a call.  Consultations are always free, and I'm always open to discussing ideas and how to make sure your project best fits your needs.

8 Comments

Brick Patterns for your Hardscaping Ideas

11/8/2013

4 Comments

 
PictureCommon Brick Patterns
Last week we talked a little bit about bricks – the good old kiln-fired clay kind, and their use in hardscaping applications.

The main focus of last week’s post was to discuss orientation of bricks – the way they’re set lengthwise, height-wise etc.  This week I want to talk a little bit about the patterns that can be created using bricks.

Before we begin discussing the patterns, I do want to revisit brick dimensions.  As we’ve established, a basic brick measures 4” x 8” x 2.5”.  A key element to recognize here is that the width (4”) is exactly half of the length (8”).  That sets up perfectly for some of the basic patterns.

Bricks used for paving are often called “paver” bricks (not to be confused with paver stones – a totally separate material).  Paver bricks are designed to measure a true 4” x 8”, allowing for tight joints with no spacing in dryset applications.

Why is it important to note this?  Because there are other brick dimensions that are meant to be used in wet-set applications where joint widths come into play.  “Modular” bricks measure approximately 3 5/8” x 7 5/8”, allowing for
joint spacing, and “standard” bricks measure roughly 3 5/8” x 8” allowing for joints in one dimension.  Additional sizes are also available based on your design and installation.  I’ll get back to these size bricks later in the post.

PictureA Custom Running Bond Pattern
As for patterns, the most basic and perhaps versatile pattern is the running bond. Bricks are set length-wise with continuous seams.  This pattern lends itself to bricks that may be slightly irregular in dimension, reclaimed bricks, or flatwork when modular or standard bricks are used rather than paver bricks.  As long as the width is consistent, you don’t have to worry about the length matching up exactly.  I also like to use this pattern in curved pathways, where we can set our running seams to mirror the curve of the path.
 
Similar to the running bond, the jack-on-jack allows for continuous seams running not only lengthwise, but across as well.  The important part to keep in mind when setting this pattern is to make sure all of your lines in both directions line up and stay straight.  You’re basically creating a grid of bricks, and the eye will pick up any slight imperfections to the grid.

PictureJack on Jack
The next two standard patterns are the basketweave and the herringbone.  The basketweave consists of two bricks placed horizontally set next to two bricks placed vertically.  All of your bricks will be set in pairs, with each pair of bricks running on one direction surrounded by four pairs of bricks running the opposite direction.  Again, it’s important to make sure your brick dimensions are true (two 4” = one 8”), and that your lines all stay straight.

The last of the basic patterns is the herring bone.  There’s a variety of ways of describing this pattern – I’ve always thought of it as sets of corresponding steps running vertically and horizontally.  The truth of the matter is the chart at the top will probably do the pattern more justice than me trying to describe it verbally.  It’s not an overly complicated pattern, but again it’s important to make sure the brick dimensions are true, and the lines stay straight.  I like this pattern because the eye is drawn not just to the linear x and y axis, but also to the diagonal nature of the bricks and the way they’re set.

Now, about the standard and modular bricks I mentioned earlier. As you can tell from the patterns and descriptions, it is important that our brick dimensions match up to keep the patterns straight and true.  Two 4” dimensions = one 8” dimension.  That works great for a dryset application when there are no mortar joints between bricks.  
 
But what happens when we add a mortar joint to the end of each brick? Let’s try it and find out – two 4” bricks, plus one ½” mortar joint (between the two bricks) equals 8.5”. One 8” brick with no joint equals 8” Not equal.

That’s where the modular bricks come in.  Remember the modular dimensions?  3 5/8” x 7 5/8”.  If you’re setting the bricks in a wet-set fashion, and plan to include mortar joints it’s important you take this into account when purchasing your bricks. Let’s try the same example as above, but using modular bricks this time.  Two 3 5/8” bricks, plus one 3/8” mortar joints equals 7 5/8”.  One 7 5/8” brick with no joint equals 7 5/8”. Ba-da-boom, good to go.

So that’s about it, perhaps a bit too much math there at the end for a Friday morning, but that’s what we’re here for, right?  Even if you’re not quite sure what pattern to go with, or how all those bricks will fit together in a nice clean pattern, give us a call or drop us a line.  We’ll be glad to help!

4 Comments

Brick Lingo 101 -- The Orientation of a Brick

11/1/2013

4 Comments

 
PictureBrick Orientation Terminology
With the year heading down the back stretch and starting to gear up for the run to the finish, it provides a good opportunity to look back at some of the projects we’ve done so far this year.  
 
The year’s projects thus far have been a diverse assortment of flagstone work, paver stone work, decks, fences, and natural stone work, in a wide range of shapes and sizes.  And one material that has presented itself in a number of projects is good old-fashioned kiln-fired brick.

I’ve always viewed brick as kind of the forgotten stepchild of the hardscaping family.  It seems like when people mention their ideas to me they’re always talking about flagstone or manmade pavers, sometimes concrete, but rarely brick.

But to be honest, brick is perhaps one of my favorite materials to use for any hardscaping project.  Or at least one that deserves fair consideration.

And if you decide to go with brick, you should probably be at least familiar with some of the basic terms. 

PictureCircular Concrete Wall Capped with "Rowlock" Bricks
A basic brick measures roughly 4” x 8” x 2.5”.  Yes, there are some minor dimensional differences depending on the type of bricks you choose, but for the purpose of this discussion we’ll go with the rounded-off dimensions.

Most people don’t give bricks much thought when they see them in use.  But take a look more closely and you’ll notice there are a number of ways of setting the bricks.  Are the bricks placed horizontally or vertically?  Is the 4” side exposed?  The 2.5” side?  The 8” side? Believe it or not there are distinct terms for how the bricks are set.

And when discussing a hardscaping project, it can be useful to know the terms. Perhaps you want the field of the surface to be set one way, with the borders set another?  Perhaps you want a certain look for the bedding edging, but another for the raised planter beds and another for the walkway borders and yet another for the main field of the walkway.

PictureConcrete Walkway with "Shiner" Edging.
So to avoid confusion, here’s a basic primer on how to refer to the bricks once they’re set.  The above chart also shows the terms as they relate to each way the brick can be set.

Stretcher:  A brick laid with its long narrow side exposed

Header:  A brick laid flat with its width at the face of the wall, or parallel to the face of the wall

Soldier:  A brick laid vertically with the long narrow side of the brick exposed

Sailor:  A brick laid vertically with the broad face of the brick exposed

Rowlock:  A brick laid on the long narrow side with the short end of the brick exposed.

Shiner:  A brick laid on the long narrow side with the broad face of the brick exposed.

So the next time you’re talking with a hardscaping contractor or brick mason, drop a term or two.  You’re likely to impress, and show that you know a thing or two about what you may be paying for.

Next week I’ll talk about a few of the basic brick patterns as they apply to hardscaping applications.

4 Comments

Jack-o-Lantern-o-Rama.  Fun with Pumpkins in the Landscape.  Happy Halloween!

10/25/2013

0 Comments

 
PictureMy 2008 World Series Champion Phillies pumpkin
I just love what they're doing with pumpkins these days.  When I was a kid, the standard Jack-o-Lantern design consisted of two triangles for eyes, an inverted triangle for the nose, and, depending on the level of creativity, either a buck-tooth-grin or Jaws-like fangs for the mouth.

Pretty much all the lines were linear -- usually cut with that old steak knife from the kitchen. 

At some point during the last 20 years or so, somebody realized that the geometric designs, as classic Peanuts as they may be, just weren't pushing the envelope of creativity.  Since that time, the levels of creativity have exploded.

I remember watching the old TV show Roseanne -- generally speaking I wasn't a big fan of the show, but their Halloween specials were rather fun.  That was the first time I remember seeing the intricately carved artistic masterpieces that are still showstoppers at pumpkin festivals.

Around that same time, the "etched" pumpkins were also becoming popular.  These aren't carved pumpkins per se, but rather lightly etched on the surface just enough to allow light through but not cut completely through the pumpkin walls.

Picture
Go Blue! Painted UM pumpkin
Picture
Spiderman pumpkin
Picture
Awesome!!
Picture
Kind of looks like the Grinch
PicturePumpkin Canabalism
From that point on, the levels of creativity just exploded.  Pumpkin stencils became available.  Painted pumpkins.  Pumpkins with props.  Pumpkins with costumes.  Upside down pumpkins.  Pumpkins eating other pumpkins.  Pumpkins with squash accessories.  Pumpkins with mum wigs and other plant accessories.

You get the idea.

Soooooo.  All of this pumpkin talk begs the question -- How are you decorating your pumpkins this year?

Happy Halloween from the whole scary Clark Kent Creations team!

0 Comments
<<Previous
Forward>>
    Picture

    Company

    Clark Kent Creations, LLC is a full-service landscape construction company servicing the Pennsylvania communities of Delaware County, Chester County, The Main Line, and the University City, Art Museum, and Manayunk/Roxborough neighborhoods of Philadelphia.  In addition to this blog page, additional information regarding the company and our services can be found on the subsequent pages of the site.
    Picture

    Author

    Clark Linderman is the president of Clark Kent Creations, LLC, a landscape construction company based in Swarthmore, PA.  He is a proud graduate of the University of Michigan.  In addition to his passion for all things outdoors, he counts Michigan football, Phillies baseball, Superman memorabilia, Memphis R&B music, and good craft brews among his many interests.  He currently resides in Swarthmore with his wife, Sheila, two sons, his dog Krypto, and a really, really messy garage full of work supplies and toys.

    Picture
    Contact Us:
    Clark Kent Creations, LLC
    Swarthmore, PA
    Design and Construction to Maximize Your Outdoor Experience

    707-290-9410
    clark@clarkkentcreations.com
    Serving Delaware County, PA

    View my profile on LinkedIn

    Categories

    All
    Business And The Front Office
    Carpentry
    Environmental Issues
    Fencing
    Guest Posts
    Hardscaping
    Inspiration And Design Ideas
    Places & Local Interest
    Ramblings
    Seasonal
    Snack Break
    Water Features

    Archives

    July 2015
    September 2014
    February 2014
    January 2014
    December 2013
    November 2013
    October 2013
    September 2013
    August 2013
    July 2013
    June 2013
    May 2013
    April 2013
    March 2013
    February 2013
    January 2013
    December 2012
    November 2012
    October 2012
    September 2012
    August 2012
    July 2012
    June 2012
    May 2012
    April 2012
    March 2012
    February 2012
    January 2012
    December 2011

    Like my Blog?

    If you like the content of my blog posts, here are a few other blogs that I check in on regularly:

    Stone Soup:  A Master Stone Mason shares his craft.

    Arcadia Gardens:  Plenty of great tips about horticulture and landscape design.  A great blog (even though she's an MSU Spartan!)

    Revolutionary Gardens:  A Virginia-based landscape designer shares his work and ideas.

    Rockin Walls:  A certified dry stone mason from Maryland shares his projects and tricks of the trade

    If you have or know of a blog that you think I might be interested in, just let me know.  If I like it I just may add it to the list!

    RSS Feed

    All content ©2013
    Clark Kent Creations, LLC
Proudly powered by Weebly