 Flagstones Set in Sand Atop a Compacted Gravel Base
 Lost in the shuffle of my writings and ramblings however, are some of the many small projects we undertake on a regular basis.
A few weeks ago we had a short week as we prepared for the long Fourth of July weekend. We had just finished a large patio project, the Thursday and Friday extended Holiday weekend was looming, and our next project wasn’t due to start until the following week because the homeowners were out of town.
Thankfully this provided us with the opportunity to fill the schedule with a small dryset flagstone walkway project.
The existing layout of the yard included a driveway that ended about 20’ short of an existing flagstone patio. The homeowners had placed a series of stepping stones connecting the driveway to the patio, but the stones would inevitably get buried beneath the encroaching grass or get covered in mud due to some suspect grading.
So they enlisted our services to fix the problem.
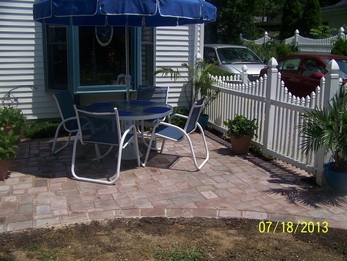
The existing patio was a wet-set PA graystone patio, set in a linear pattern of squares and rectangles. The homeowners really liked the look of the natural stone, however their personal tastes ranged more on the rustic irregular side of things. And they didn’t want to spend a lot of money on a small walkway.
So we decided upon a dryset walkway using irregular-shaped PA graystones.
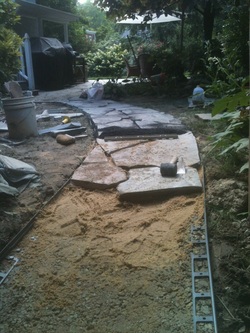
The project began by excavating out the footprint for the new walkway, digging approximately 6” down where the new walkway was to be installed. The footprint was then filled with crushed modified gravel and compacted to give a firm foundation to the new walkway.
We then covered the compacted gravel with a thin (approximately 1” +/-) layer of sand. The sand helps to give a softer bed in which to place the flagstones, and also helps to accommodate for the slight difference in stone thickness without affecting the finish grade.
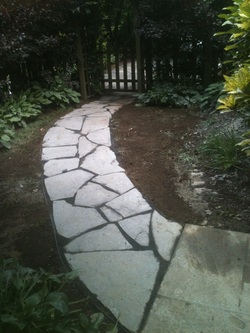
 The Completed Project
 bed of sand, making sure we have a firm placement with no rocking or wobbling of the stones. For a dryset application such as this, we like to use thicker stones to help keep them in place and avoid them “floating” on top of the sand.
For a professional look, it is important to keep the joint widths between each stone to a minimum. As a result there is certainly some “puzzle-building” that needs to occur.
I like to lay out all the stones in advance so I can get a true sense of the sizes and shapes we’ll be working with. Maybe it’s just the geography geek in me, but I tend to envision each stone as a shape of a state. As the pieces start to fit together, it’s not uncommon for me to think to myself “we need a South Carolina to fit over here”, or “if only we had an Ohio to fit against the curve of that last one”. (Editor’s note: some states just don’t work – stay away from the skinny panhandles of Florida and Oklahoma, West Virginia just doesn’t look natural, and Michigan, well forget about that whole Upper Peninsula thing …)
Sometimes we will have to do some minor cutting of the stones to help get a clean fit, but we try to avoid it as much as possible. The less cutting you do, the more natural it will look.
Once all the stones are placed and fit together nicely, the last step is to sweep the walkway to fill in the joints. We usually sweep the joints with “screenings” – a by-product of the quarrying process consisting of small crumbs of stone that lock together nicely and avoid washing out.
And that’s it. Start-to-finish in this case the project took about 2 and a half days. The perfect filler between some of our larger projects. The homeowner is happy with their new walkway, and we get to keep working despite an awkward calendar and a short week.
Do you have a small hardscaping project that you’ve been putting off, or just assume a contractor won’t want to handle? If so, give us a call. I’ll be happy to come take a look.


 RSS Feed