Clark Kent Creations -- Swarthmore, PA. Landscape Design and Construction, Hardscaping, Patios
  • Home
  • Services/Photos
    • Hardscaping >
      • A Flagstone Walkway -- The Process
      • Stone Steps -- The Process
    • Wood Fences
    • Exterior Carpentry
  • About
  • Community

Patio Construction in Delaware County, PA

11/29/2013

2 Comments

 
Picture
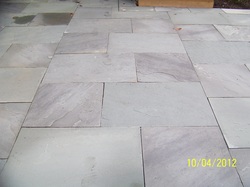
Dryset PA Blue Flagstone
A quick, picture-heavy post this week as we break for the Thanksgiving Holiday and spend some quality time with loved ones and friends.

Just a reminder that as we approach the end of the 2013 season, it doesn't mean you have to put your outdoor plans on hold until the spring.  The winter months are a great time to spend planning and thinking about next spring's projects.  Spend the prep time now,and you'll be ready to hit the ground running come the return of warm weather and longer days next spring.

We service all of Delaware County, PA and parts of The Main Line and West Chester.  Whether its natural flagstone, manmade pavers, clay brick or concrete, we are experienced in all hardscaping mediums.

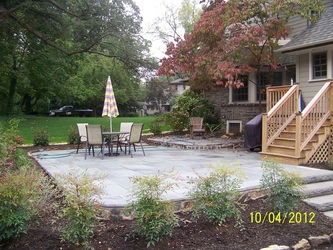
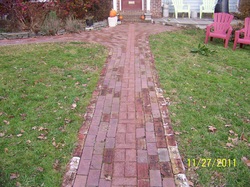
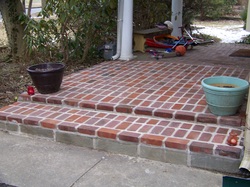
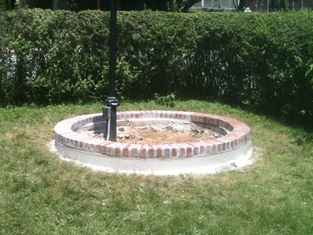
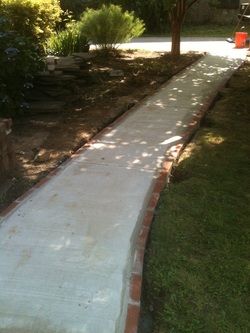
Here's a few pictures of some various patio projects we've done over the past few years -- hopefully they can serve as some inspiration!

Picture
EP Henry Pewter Blend Pavers with Natural Stone Steppers
Picture
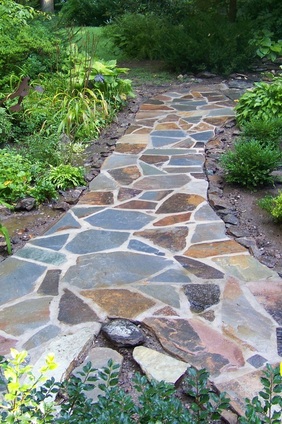
Wetset Irregular Flagstone, Blended Mix
Picture
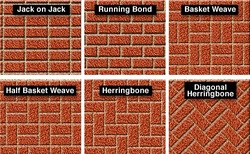
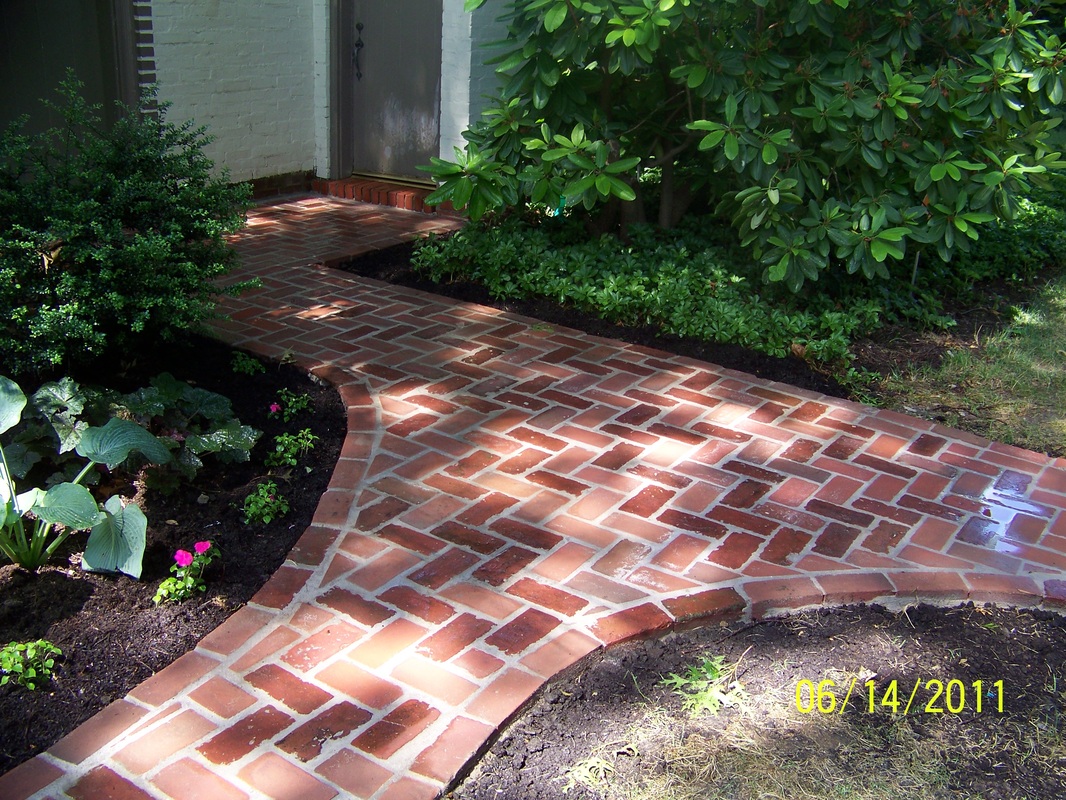
Wetset Brick, Herringbone Pattern
Picture
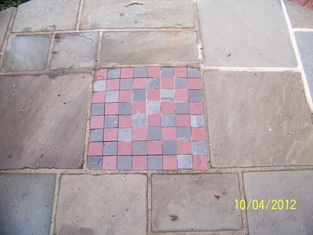
Inset Chess Board, Red and Black Slate
Picture
Wetset PA Gray Flagstone, Irregular Shape
Picture
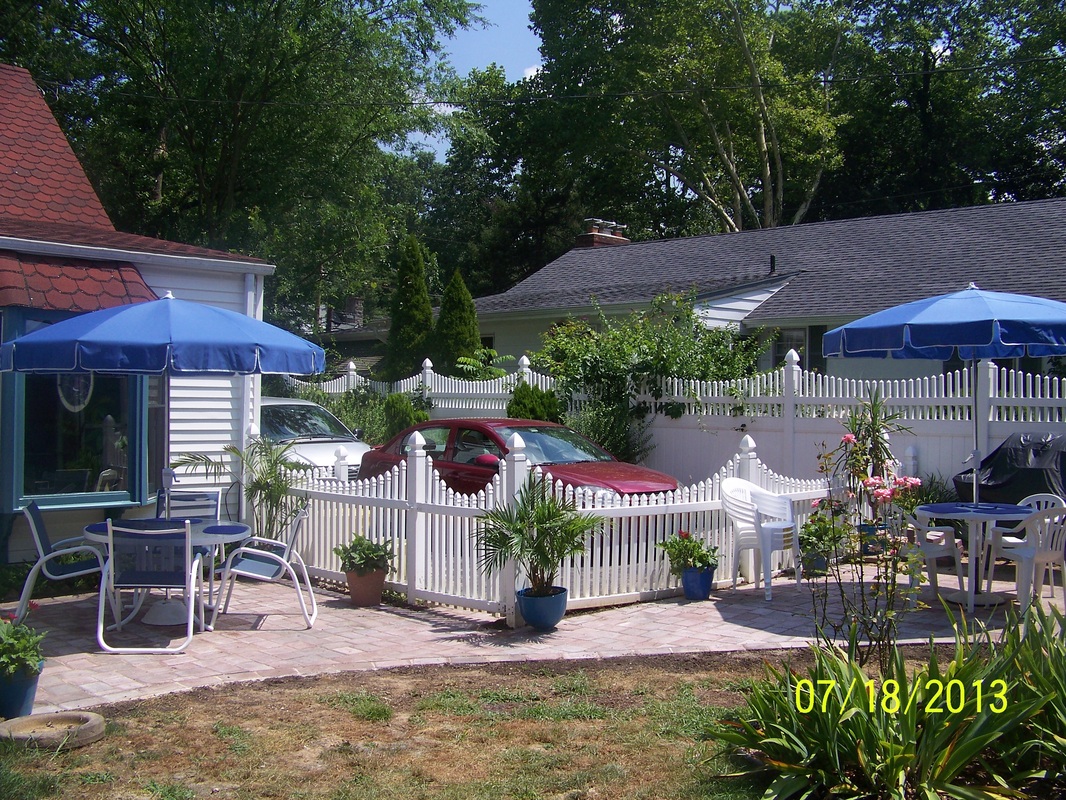
EP Henry Coventry Pavers, Harvest Blend
Picture
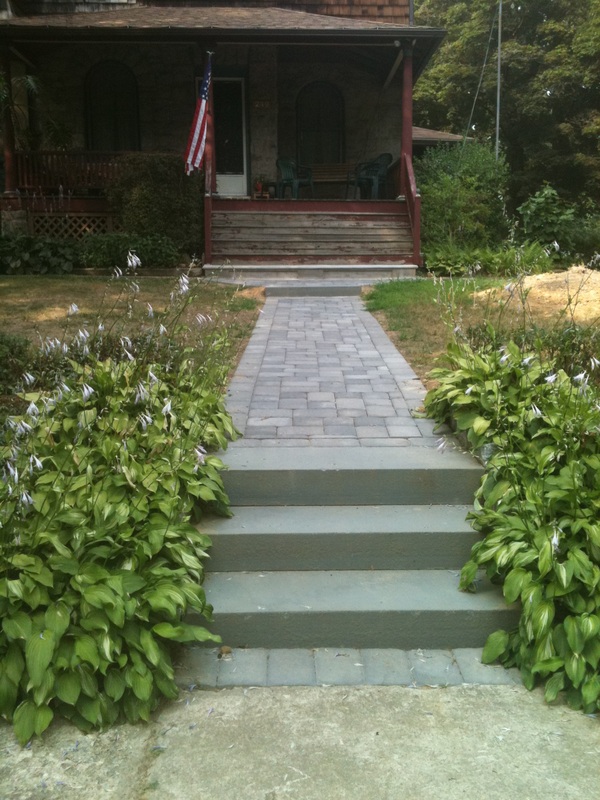
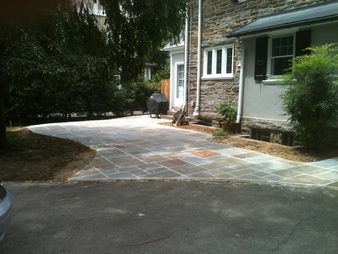
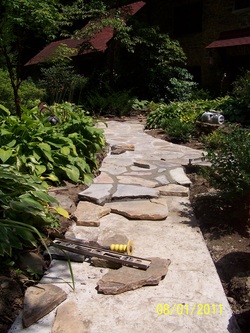
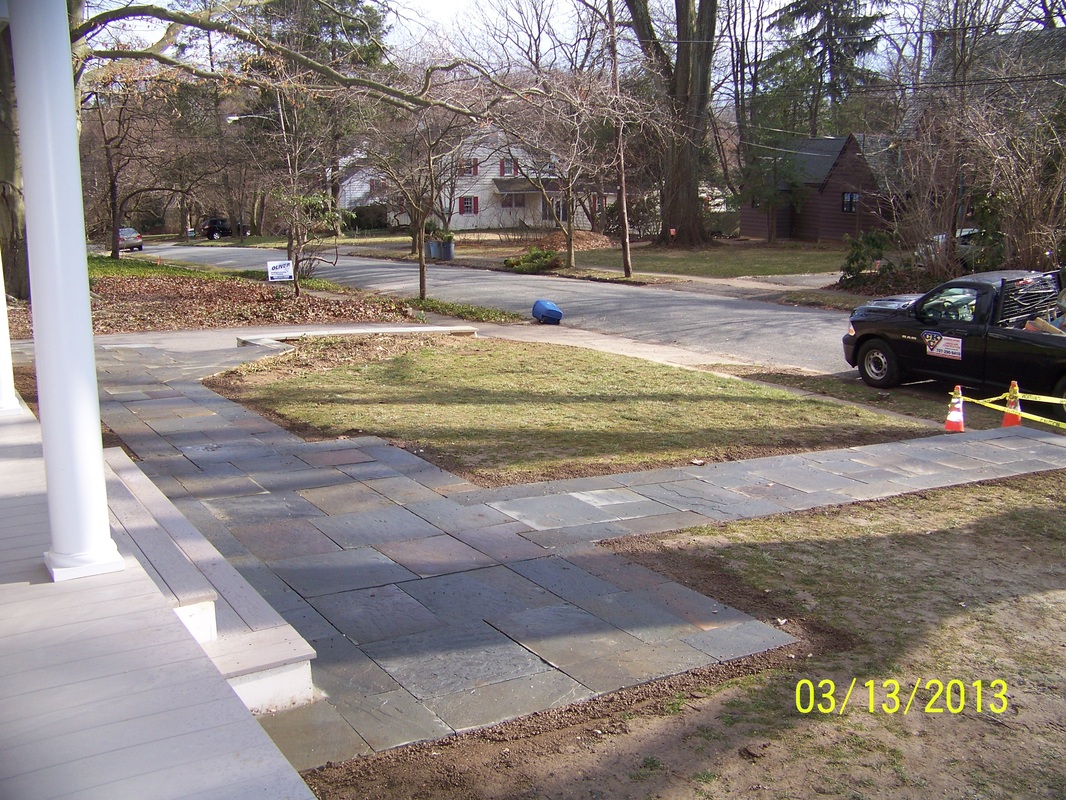
Dryset PA Gray Flagstone, Linear Shapes
Picture
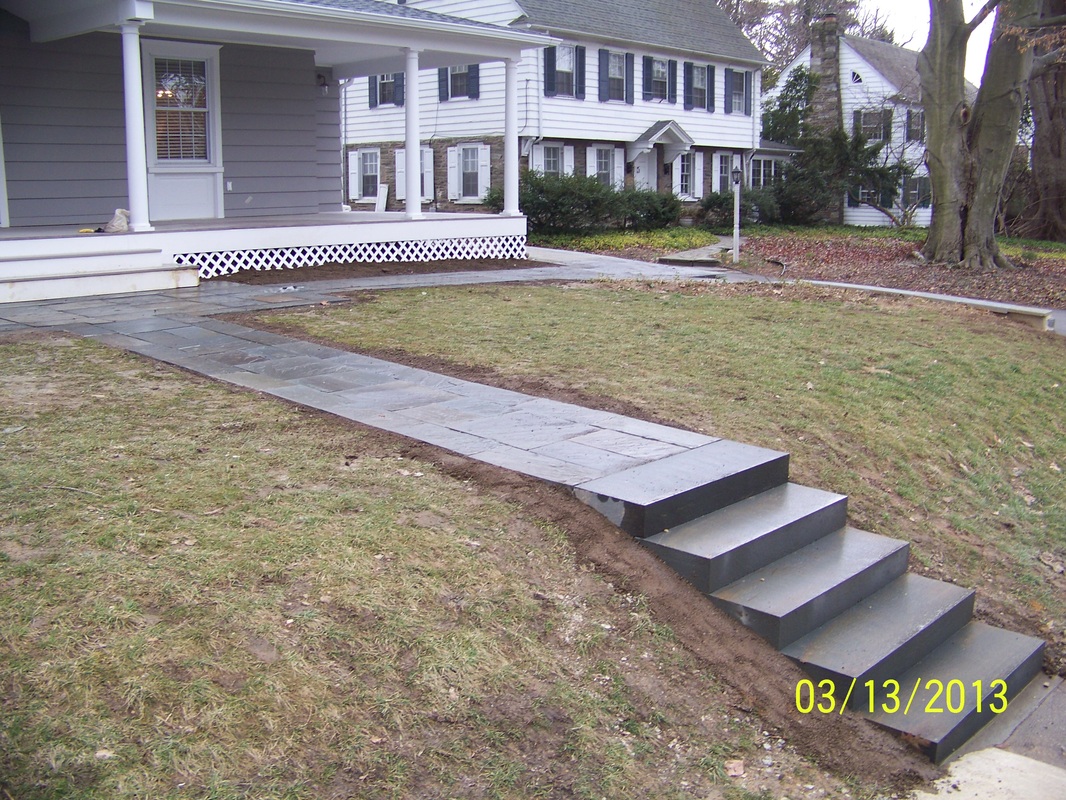
Dryset Flagstones with Natural Stone Steppers
PictureWetset Flagstone, Linear Shapes
And keep in mind, consultations are always free!  No matter what type of outdoor living space you're thinking about -- flagstone, pavers, wet or dry set, a new deck -- you name it, Clark Kent Creations is here to help!

A new outdoor living space might be just the ticket for that perfect Christmas gift you've been trying to think of too!

Give us a call and lets get that ball rolling for next spring.

2 Comments

Stonework, Screwguns, and Gardens -- 21 Things I'm Thankful for this Thanksgiving

11/22/2013

2 Comments

 
PictureI'm Thankful for the Simpsons Too
With Thanksgiving here this week (can you hardly believe it?!), I thought I'd take a moment to reflect on the things I'm thankful for -- both from a professional point-of-view and on a personal level.
 
Apologies in advance for all the things I'm leaving off.

So here it is -- 21 things I'm thankful for ...

1.  My Family -- Both my immediate family and my extended family.  I could probably draft a larger list listing each of my family members by name, and highlighting how they add to my life, but for the purposes of this list, we'll list them as one.  You know how much each and every one of you mean to me.

2.  My Friends --  I've been tight with some of you since we were young 'uns, others I've picked up along the way, and still others I've known just a few years -- but regardless of how long I've known you, I always enjoy sharing a laugh, and knowing we're there for each other.

3.  My Health --  Definitely getting to that age where I can't take this one for granted anymore.  Every healthy, active day is a blessing.

4.  Beautiful Stonework.  OK, so it's part of what I do, but the more I work with stone, the more I appreciate the true masterpieces, and am humbled by what the masters can do.  This is truly an art form that one could spend a lifetime attempting to master.  I'm thankful to live in an area where there is so much beautiful stonework to admire on a daily basis.

5.  My Employees -- past and present.  All the projects we've done over the years, all the project pictures you see on this website -- your blood, sweat and tears are part of those projects.  (Thankfully not too much blood).  Thank you.

6.  Cordless drills/screwguns.  We build a fair amount of fences and decks.  I can't even begin to imagine how this was done with a simple hammer and nails.  Really makes you appreciate what was accomplished in the old days.

7.  Swarthmore.  Many of you familiar with "The Swat" know what I'm talking about, but for those not familiar with it you really have to experience it to believe it.  Great people, natural beauty, great architecture, a safe walkable/bikeable community, great schools, and great activity resources.

8.  A Sense of Humor.  When times are stressful or down, sometimes a good, intelligent laugh is the best cure.

9.  Hawaiian shirts.  What can I say?  I like 'em.  They're fun.

10.  My Clients.  While we are a providing a service for you, you are the ones who make it all possible.  I've met some really great people over the years, who have made my life richer.

11.  Hikes in the Woods.  One always finds something new and interesting, often when not actively searching.  Sometimes you hit the ground running, other days it's all you can do to get motivated.  But I always feel great when I'm done.  And better off for it.

12.  Music.  The soundtrack of life.  Can't possibly imagine life without it.

13.  The Internet Community.  So as much as I grumble about the "internet-ization" of society, proliferation of ID passwords, and the lack of real social interaction (all very valid complaints, I might add), there are some amazing resources out there, available with just the click of a button.  Whether it's sourcing materials, searching for pictures and information, or sharing information via forums, the internet can be a great thing.  And for my forum friends (you know who you are), I can't thank you enough for all the information and feedback you've provided over the years.  Hopefully I reciprocate as much as I take away.  I try.

14.  My Supplier Network -- There's a number of suppliers who I rely on consistently to provide quality materials and services, but I owe a special shout-out to Galantino Supply Company -- always helpful, always friendly, and always glad to help with the highest level of professionalism.

15.  Slider-Flip-flops.  You know when you're lounging around at home in your socks, and you realize you need to run out for a quick errand, but you don't feel like dealing with shoelaces?  And since old-school flip-flops have that annoying prongy thing next to the big toe, you can't wear them with socks, at least not comfortably.  Love my slider flip flops.  I'll throw my cowboy boots into this category too, for when it's even colder or wet.

16.  The Arts.  Whether it's fine painting, beautiful architecture, drama, music, or dance, art is the decoration of life that makes you appreciate it.  Take away the arts, and there's not much left.

17.  Teachers.  Being married to one, I see firsthand the dedication involved to helping young citizens grow and become their best.  And I can certainly think back on a number of teachers who have had a dramatic impact on my life.

18.  A Healthy Planet.  But one we must respect.  There's a lot of talk being thrown around about the earth's problems and man's impact, but in the here and now it's amazing what Mother Earth provides for us.  I can only hope that the Earth we know and love will remain relatively the same for at least my children and my children's children's lives. 

19.  Gardens.  Man's interaction and interpretation of nature.  Whether it's a formal English garden, interactive children's garden, Japanese meditation garden, an urban rooftop -- the list could be endless -- it always amazes me what can be created when man patiently tends to and cultivates a piece of the planet.

20.  Good Food and Drink.  Creating good food is an art form unto itself, and definitely worthy of our appreciation.  Whether it's formal culinary arts, informal roadside barbecue, small-batch brewing, or wine-making, how can you not appreciate this one.  Especially now at Thanksgiving time?

21.  A Peaceful Soul.  Some days more than others.  But I always sleep easily at night knowing that I've done what I do to the best of my ability, been honest with myself and others, and looked out for the interests of everyone around me as best as I can.  You can't ask anything more of anybody than that.

I sincerely wish everybody a healthy and happy Thanksgiving.  Wishing you a long list of things you can be thankful for.


2 Comments

Dry Set vs. Wet Set Hardscaping.  Which One is Right For You?

11/15/2013

8 Comments

 
PictureWet-Set Installation in Progress
** Editors Note -- The following is a reposted article from part of a larger hardscaping series we ran last year.  But it is perhaps one of the most commonly asked questions during the sales cycle.  Certainly worth revisiting.

As I've stated in the past, there are a lot of decisions that need to be made in conjunction with planning for a new outdoor living space.  This week I’d like to discuss the differences between a wet-set installation and a dry-set installation, and the advantages and disadvantages of each.

First, a quick lesson.  Hardscaping projects generally fall into one of two basic categories; Wet Set or Dry Set.  While there are a lot of options to consider when selecting materials, no matter what material you choose they will be set using one of these two techniques. Wet set refers to setting the materials in a bed of mortar.  (The mortar was mixed and was wet when we set the stones, get it?)  Dry set refers to setting the stones atop a bed of compacted crushed gravel and sand.  No mortar, no concrete, thus the “dry” label.

In either case, the process begins with excavating out the footprint a minimum of 8”.  What happens from there depends on the technique.

A wet set application includes a base layer of gravel to separate the native soil from the new install.  Forms are then set at the necessary grade along the perimeter of the new install, be it a path, patio, or combination of the two.  A 4” thick rebar-reinforced concrete pad is then installed to serve as the base.  This pad is typically rough-finished, as the finish will be concealed by the eventual installation of the flagstone.  The grade of the concrete should be approximately 2” below the desired finish grade, to accommodate the flagstone and mortar thickness.

Once the concrete has set, the perimeter forms are removed and flagstones can begin being mortared to the surface.  When all is said and done, you will have a solid, rigid, impermeable surface.  It is long lasting and durable, however it can be more difficult and/or costly to repair or reset if necessary.  The technique is also subject to any impermeable surface requirements that many municipalities are requiring for stormwater management purposes.

On the other hand, a dry set application includes approximately 6” of compacted crushed gravel as the base, in lieu of a concrete foundation.  Once the base gravel has been compacted (typically compacted in a series of three-inch lifts), a thin layer of sand is spread evenly across the gravel base. Flagstones are then set atop the sand bed, allowing for a slightly permeable installation that offers some degree of flexibility.  We typically use thicker heavier stones on dryset installations, as the weight of the stones offers strength and weight to hold the stones in place.

PictureDry-Set Installation with "Butt" Joints
Because of the flexible nature of the installation, dry set installations are less likely to crack, and can be easily lifted and re-set if necessary.  The flexible nature is slightly more prone to frost heaving and settling however.

As for costs, typically the dry set technique runs about $5 to $6 cheaper a square foot then the wet set technique, assuming the stone selection is comparable.

So again the question becomes which one is right for you, and again the answer is that it depends on your personal taste (I’m not going to make all the decisions for you, you know!).  I can tell you that we don’t do too many irregular shaped dryset installations, mostly due to the wider joint widths and the potential of joint material washing out.  But we have done them, and we can address the joint material issue as well if that’s where your heart truly rests.  Linear designs lend themselves quite nicely to either dry or wet set applications, and you do have the option of “butt” joints (meaning near-zero joint widths) on the dry-set option as well.  

If you'd like to discuss which application is right for your project, just give us a call.  Consultations are always free, and I'm always open to discussing ideas and how to make sure your project best fits your needs.

8 Comments

Brick Patterns for your Hardscaping Ideas

11/8/2013

4 Comments

 
PictureCommon Brick Patterns
Last week we talked a little bit about bricks – the good old kiln-fired clay kind, and their use in hardscaping applications.

The main focus of last week’s post was to discuss orientation of bricks – the way they’re set lengthwise, height-wise etc.  This week I want to talk a little bit about the patterns that can be created using bricks.

Before we begin discussing the patterns, I do want to revisit brick dimensions.  As we’ve established, a basic brick measures 4” x 8” x 2.5”.  A key element to recognize here is that the width (4”) is exactly half of the length (8”).  That sets up perfectly for some of the basic patterns.

Bricks used for paving are often called “paver” bricks (not to be confused with paver stones – a totally separate material).  Paver bricks are designed to measure a true 4” x 8”, allowing for tight joints with no spacing in dryset applications.

Why is it important to note this?  Because there are other brick dimensions that are meant to be used in wet-set applications where joint widths come into play.  “Modular” bricks measure approximately 3 5/8” x 7 5/8”, allowing for
joint spacing, and “standard” bricks measure roughly 3 5/8” x 8” allowing for joints in one dimension.  Additional sizes are also available based on your design and installation.  I’ll get back to these size bricks later in the post.

PictureA Custom Running Bond Pattern
As for patterns, the most basic and perhaps versatile pattern is the running bond. Bricks are set length-wise with continuous seams.  This pattern lends itself to bricks that may be slightly irregular in dimension, reclaimed bricks, or flatwork when modular or standard bricks are used rather than paver bricks.  As long as the width is consistent, you don’t have to worry about the length matching up exactly.  I also like to use this pattern in curved pathways, where we can set our running seams to mirror the curve of the path.
 
Similar to the running bond, the jack-on-jack allows for continuous seams running not only lengthwise, but across as well.  The important part to keep in mind when setting this pattern is to make sure all of your lines in both directions line up and stay straight.  You’re basically creating a grid of bricks, and the eye will pick up any slight imperfections to the grid.

PictureJack on Jack
The next two standard patterns are the basketweave and the herringbone.  The basketweave consists of two bricks placed horizontally set next to two bricks placed vertically.  All of your bricks will be set in pairs, with each pair of bricks running on one direction surrounded by four pairs of bricks running the opposite direction.  Again, it’s important to make sure your brick dimensions are true (two 4” = one 8”), and that your lines all stay straight.

The last of the basic patterns is the herring bone.  There’s a variety of ways of describing this pattern – I’ve always thought of it as sets of corresponding steps running vertically and horizontally.  The truth of the matter is the chart at the top will probably do the pattern more justice than me trying to describe it verbally.  It’s not an overly complicated pattern, but again it’s important to make sure the brick dimensions are true, and the lines stay straight.  I like this pattern because the eye is drawn not just to the linear x and y axis, but also to the diagonal nature of the bricks and the way they’re set.

Now, about the standard and modular bricks I mentioned earlier. As you can tell from the patterns and descriptions, it is important that our brick dimensions match up to keep the patterns straight and true.  Two 4” dimensions = one 8” dimension.  That works great for a dryset application when there are no mortar joints between bricks.  
 
But what happens when we add a mortar joint to the end of each brick? Let’s try it and find out – two 4” bricks, plus one ½” mortar joint (between the two bricks) equals 8.5”. One 8” brick with no joint equals 8” Not equal.

That’s where the modular bricks come in.  Remember the modular dimensions?  3 5/8” x 7 5/8”.  If you’re setting the bricks in a wet-set fashion, and plan to include mortar joints it’s important you take this into account when purchasing your bricks. Let’s try the same example as above, but using modular bricks this time.  Two 3 5/8” bricks, plus one 3/8” mortar joints equals 7 5/8”.  One 7 5/8” brick with no joint equals 7 5/8”. Ba-da-boom, good to go.

So that’s about it, perhaps a bit too much math there at the end for a Friday morning, but that’s what we’re here for, right?  Even if you’re not quite sure what pattern to go with, or how all those bricks will fit together in a nice clean pattern, give us a call or drop us a line.  We’ll be glad to help!

4 Comments

Brick Lingo 101 -- The Orientation of a Brick

11/1/2013

4 Comments

 
PictureBrick Orientation Terminology
With the year heading down the back stretch and starting to gear up for the run to the finish, it provides a good opportunity to look back at some of the projects we’ve done so far this year.  
 
The year’s projects thus far have been a diverse assortment of flagstone work, paver stone work, decks, fences, and natural stone work, in a wide range of shapes and sizes.  And one material that has presented itself in a number of projects is good old-fashioned kiln-fired brick.

I’ve always viewed brick as kind of the forgotten stepchild of the hardscaping family.  It seems like when people mention their ideas to me they’re always talking about flagstone or manmade pavers, sometimes concrete, but rarely brick.

But to be honest, brick is perhaps one of my favorite materials to use for any hardscaping project.  Or at least one that deserves fair consideration.

And if you decide to go with brick, you should probably be at least familiar with some of the basic terms. 

PictureCircular Concrete Wall Capped with "Rowlock" Bricks
A basic brick measures roughly 4” x 8” x 2.5”.  Yes, there are some minor dimensional differences depending on the type of bricks you choose, but for the purpose of this discussion we’ll go with the rounded-off dimensions.

Most people don’t give bricks much thought when they see them in use.  But take a look more closely and you’ll notice there are a number of ways of setting the bricks.  Are the bricks placed horizontally or vertically?  Is the 4” side exposed?  The 2.5” side?  The 8” side? Believe it or not there are distinct terms for how the bricks are set.

And when discussing a hardscaping project, it can be useful to know the terms. Perhaps you want the field of the surface to be set one way, with the borders set another?  Perhaps you want a certain look for the bedding edging, but another for the raised planter beds and another for the walkway borders and yet another for the main field of the walkway.

PictureConcrete Walkway with "Shiner" Edging.
So to avoid confusion, here’s a basic primer on how to refer to the bricks once they’re set.  The above chart also shows the terms as they relate to each way the brick can be set.

Stretcher:  A brick laid with its long narrow side exposed

Header:  A brick laid flat with its width at the face of the wall, or parallel to the face of the wall

Soldier:  A brick laid vertically with the long narrow side of the brick exposed

Sailor:  A brick laid vertically with the broad face of the brick exposed

Rowlock:  A brick laid on the long narrow side with the short end of the brick exposed.

Shiner:  A brick laid on the long narrow side with the broad face of the brick exposed.

So the next time you’re talking with a hardscaping contractor or brick mason, drop a term or two.  You’re likely to impress, and show that you know a thing or two about what you may be paying for.

Next week I’ll talk about a few of the basic brick patterns as they apply to hardscaping applications.

4 Comments
    Picture

    Company

    Clark Kent Creations, LLC is a full-service landscape construction company servicing the Pennsylvania communities of Delaware County, Chester County, The Main Line, and the University City, Art Museum, and Manayunk/Roxborough neighborhoods of Philadelphia.  In addition to this blog page, additional information regarding the company and our services can be found on the subsequent pages of the site.
    Picture

    Author

    Clark Linderman is the president of Clark Kent Creations, LLC, a landscape construction company based in Swarthmore, PA.  He is a proud graduate of the University of Michigan.  In addition to his passion for all things outdoors, he counts Michigan football, Phillies baseball, Superman memorabilia, Memphis R&B music, and good craft brews among his many interests.  He currently resides in Swarthmore with his wife, Sheila, two sons, his dog Krypto, and a really, really messy garage full of work supplies and toys.

    Picture
    Contact Us:
    Clark Kent Creations, LLC
    Swarthmore, PA
    Design and Construction to Maximize Your Outdoor Experience

    707-290-9410
    clark@clarkkentcreations.com
    Serving Delaware County, PA

    View my profile on LinkedIn

    Categories

    All
    Business And The Front Office
    Carpentry
    Environmental Issues
    Fencing
    Guest Posts
    Hardscaping
    Inspiration And Design Ideas
    Places & Local Interest
    Ramblings
    Seasonal
    Snack Break
    Water Features

    Archives

    July 2015
    September 2014
    February 2014
    January 2014
    December 2013
    November 2013
    October 2013
    September 2013
    August 2013
    July 2013
    June 2013
    May 2013
    April 2013
    March 2013
    February 2013
    January 2013
    December 2012
    November 2012
    October 2012
    September 2012
    August 2012
    July 2012
    June 2012
    May 2012
    April 2012
    March 2012
    February 2012
    January 2012
    December 2011

    Like my Blog?

    If you like the content of my blog posts, here are a few other blogs that I check in on regularly:

    Stone Soup:  A Master Stone Mason shares his craft.

    Arcadia Gardens:  Plenty of great tips about horticulture and landscape design.  A great blog (even though she's an MSU Spartan!)

    Revolutionary Gardens:  A Virginia-based landscape designer shares his work and ideas.

    Rockin Walls:  A certified dry stone mason from Maryland shares his projects and tricks of the trade

    If you have or know of a blog that you think I might be interested in, just let me know.  If I like it I just may add it to the list!

    RSS Feed

    All content ©2013
    Clark Kent Creations, LLC
Proudly powered by Weebly