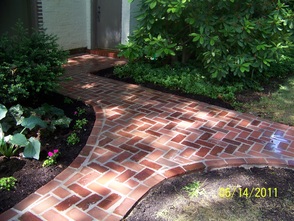
 Wet-set Brick Walkway
 Every single meeting I’ve ever had with a client or prospect to discuss a new hardscaping project always ends up with one question.
“So how much is it going to cost?”
Well that’s kind of the million dollar question, isn’t it? And hopefully, it’s not a million dollar answer.
Rest assured, unless you have the biggest, grandest dreams for a patio I’ve ever seen, your patio is not going to cost a million dollars.
But the question is certainly a legitimate one, and one which we’re asked all the time.
And of course, the answer varies based on a number of factors. Size and materials are probably the two biggest factors, but other site-specific factors can also come into play, which is why most contractors are always a bit hesitant to mention even a ballpark price without seeing the site first.
But I’m going to buck the trend. Right here. Right now.
No wait, I will tease you a bit more. It’s important to note that the costs I’m about to share are BALLPARK COSTS. Every site is different. Conditions. Access. Soil. Trees. Roots. Can we fit a dumpster in the driveway? Can we stage the pallets next to where we’re working? Is there easy-to-access power? Easy-to-access water? Will the yard drain properly? Do we need a pump truck for concrete? Do we need to build up the grade with a wall? Etc. You get the idea.
So no, those “We install Flagstone Patios for $12/square foot” signs I’ve seen around probably aren’t telling you everything. And to be honest, I’d be a little scared to trust their work.
Here’s more of what prices should look like here in Delaware County, PA, suburban Philadelphia.
Finished Concrete: $10-$13 / square foot
Dryset Bricks: $18-$21 / square foot
Dryset Paver Stones: $19-$22/ square foot
Dryset Flagstone (PA Gray Full Color Natural Cleft): $23-$24 / square foot
Wetset Bricks: $24-$27 square foot
Wetset Flagstone (PA Gray Full color Natural Cleft): $27-$29 / square foot
Again, these are BALLPARK costs. And in addition to the site conditions listed above, economy of scale plays into it too. So a 4x4 sidewalk square replacement certainly isn’t going to be priced at the same rate as a 700 sf patio project.
It’s also important to note that costs can vary based on who is doing the work.
If you hire a weekend warrior who found you driving around the neighborhood, you may be paying a bit less than a reputable, referred, licensed contractor. But what is his experience? Is he licensed? Insured? Are his workers on payroll? These sort of things can certainly offer peace of mind. But guess what – they also cost money for us contractors. So if you’re willing to take a risk – sure, maybe you can save a few bucks. But if you want to be sure of what your money is being spent on, going the licensed route is the way to go.
A properly built patio or walkway will last at least as long as you stay in your house, and most likely well beyond the time when you decide to move on. It will provide years of enjoyment and most likely add value to your home. But the key phrase to that sentence is “properly built.”
When I provide estimates to prospects, they are usually well prepared for the numbers that accompany the estimate. They know they’re hiring us because of our level of expertise, our ability to not only do the heavy lifting and digging, but to construct something that is beautiful and will last, and that we have the experience to offer suggestions and make sure the job not only gets done right, but meets their goals in terms of how it will get used. All while taking the necessary site conditions into account.
Not to say that the occasional client doesn’t suffer a bit of sticker shock on occasion when they see the price, but once they swallow that lump in their throat they are usually on board with the project. You get what you pay for.
So there you go. Ballpark pricing. Hopefully this will help define your budget. And once that’s defined, the next step is to nail down the specifics. If you’d like a free site consultation and cost estimate give us a call. We’d love to see what we can do for you!
** Editors Note: The CKC blog will not appear next week, as the author takes a little mid-season R&R. We'll be back in July with more weekly posts. Have a great 4th of July everybody!


 RSS Feed