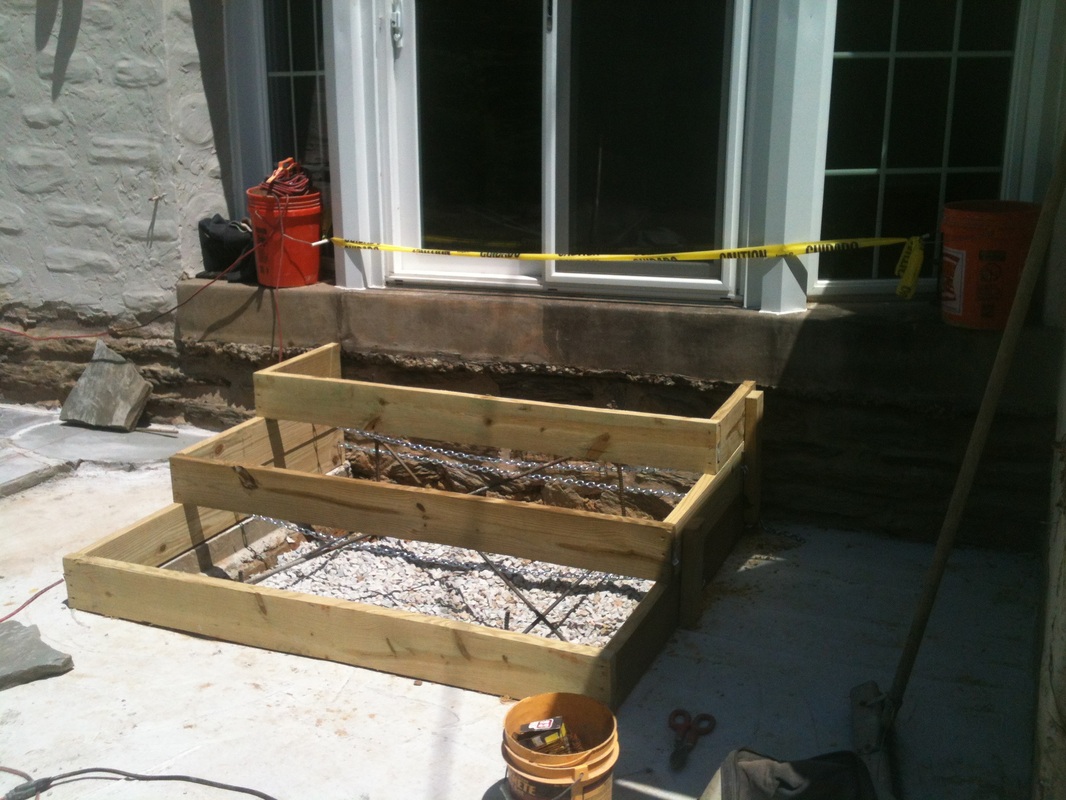
 A Rough Build-up of the Forms in Progress. More Bracing to Come
 Last week I posted some follow-up pictures to a recent flagstone patio we completed. Part of that project included a simple set of steps leading from the back door down to the patio grade.
I've talked about building steps before -- in fact there's a stand-alone page here on the site dedicated to starting a step project from scratch.
But I did want to spend a bit of time this week talking about building forms for concrete steps.
For flatwork such as patios and walkways, setting concrete forms really isn't that difficult. As long as you pay attention to the grades and ID your footprint, it's actually kind of simple. But steps get a bit trickier, mostly because of the amount of weight that the forms are expected to hold while the concrete is being poured.
The step project that I'm highlighting here included three steps, each measuring about 18" d x 6' w. Including the necessary footer, the whole pour took about two yards of concrete. That's about 8,000 lbs!! And if you think a few simple nails will hold that kind of weight, well think again. And if you don't believe me, feel free to try it yourself on your own dime.
The key to building forms for steps is to think like the concrete. Where will the pressure build? Where is the weak link that the concrete will try to escape? What is likely to pop or bow? All while keeping in mind that the forms need to be easily removed once the concrete sets.
For flatwork forms, we typically use Duplex nails to connect the stakes to the forms -- easy to install, easy to remove. But for steps? I'm not a big fan of nails for step forms. If they're not in solidly they can pop pretty easily. If you've ever been involved with a concrete pour when a form blows, you know it's not a fun experience.
So to avoid the forms blowing mid-pour, I usually use screws for the step forms -- a much stronger connection. But there are a few precautions that need to be taken. First, make sure you don't over sink the screws into the wood. I usually leave about an 1/8" sticking out so I can easily find the screws when it comes time to remove the forms. Secondly, it's not a bad idea to cover the screw heads to avoid concrete clogging up the screw heads. A simple extra 10 seconds with some duct tape over the screws can save hours of banging your head against the newly formed concrete when all is said and done.
Additionally, if you think all that is required is just forming out the treads and risers, think again. The picture on the right below shows a good illustration of the front bracing. This helps keep the tread widths uniform, as the tendency is for the risers to bow out as the concrete is being poured.
I also tend to avoid pouring directly from the concrete truck right into the hole. Sometimes it is tempting as it can save some labor having to wheel and/or shovel the concrete in, but as mentioned above we're talking about 8,000 lbs of concrete, and that's just for three simple steps. Imagine that 8,000 pounds being dumped forcefully from the truck into the hole. If you want to put added pressure on your forms, that's a good way to do it.
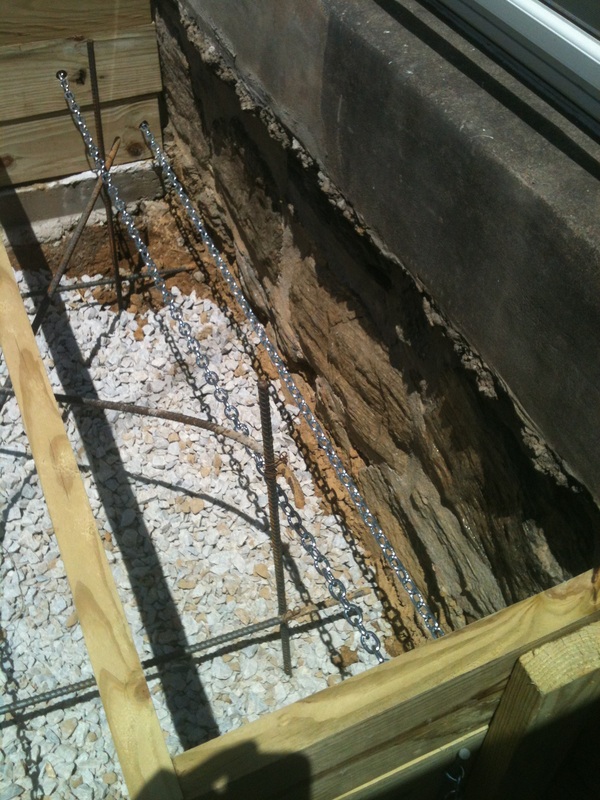
Chain and Rebar Detail
| 
Chain Connections to Forms
| 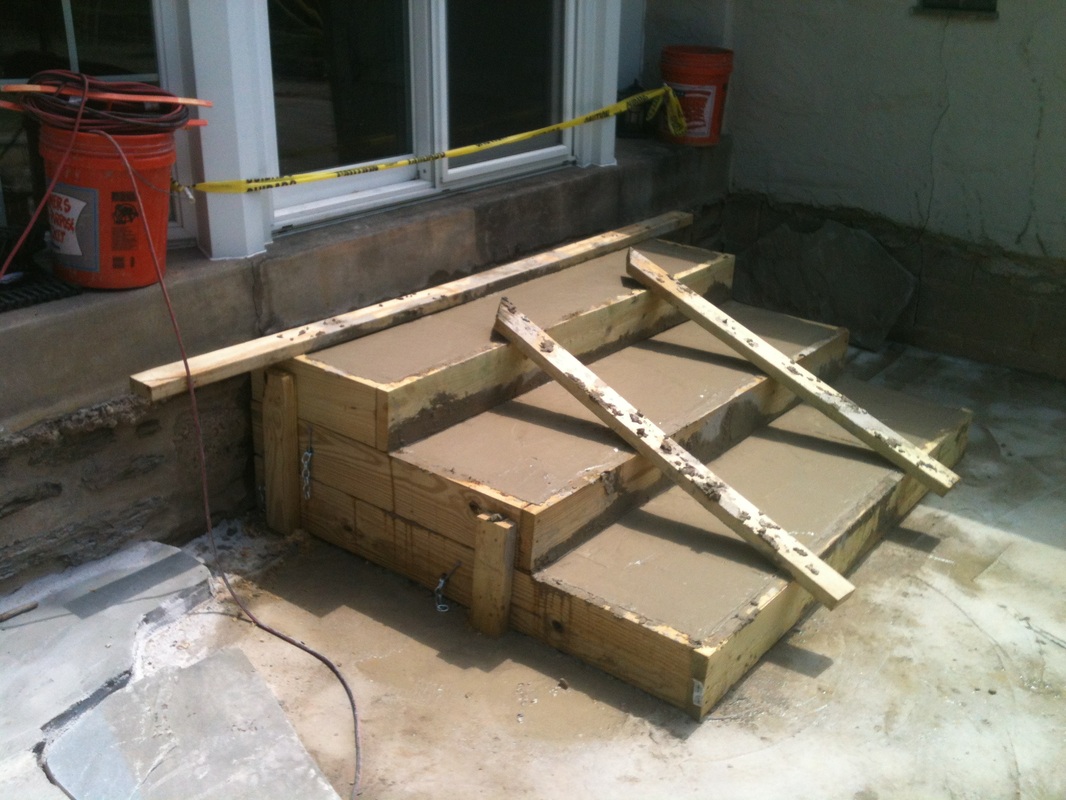
The Completed Pour
|
 And the Completed Project
 This pour was somewhat interesting, because as documented in last week's post, we poured the steps about a week after the surrounding patio was poured. As a result, we didn't have a whole lot of soft ground in which to stake in our forms.
To address that, I needed to come up with a good way of securing the side walls so they wouldn't blow out or pull apart. The answer -- chain.
Yup, there's a series of imbedded chains inside those completed steps, running the full width of the steps. Since nobody is going to see the inside of the concrete, and since the exterior was slated to get veneered, I wasn't really concerned about leaving the chains in.
If you look at the two pictures on the left in the above sequence of three, you'll see the chain running across the width of the steps. I drilled holes just wide enough for the chain in the forms, and secured the chain on the outside using a simple nail through one of the links. As the pressure from the concrete intensified during the pour, the outside walls wanted to push out, but were prevented in doing so by the nail holding the chain and forms in place. The end result was two perfectly plumb sidewalls, with no bowing or blowouts.
When the pour was done we simply pulled the nails (which had imbedded themselves slightly into the wood thanks to the force of the concrete), unscrewed our forms, removed the wood, and BAM -- concrete step foundation ready to go!
As mentioned above, the most important thing is to make sure every board is braced and secured in every direction, with attention to making sure the access is on the outside of the concrete so the forms can be removed easily.
A few days later we began veneering the sides and risers, mortared the treads, and we were done!
Steps are key in any landscaping project, and knowing how to build the forms for a concrete pour is an important (brace yourself for this one folks) step!
Think you may need a set of steps for your next project? Give us a call and we'll see what we can do for you!


 RSS Feed