Clark Kent Creations -- Swarthmore, PA. Landscape Design and Construction, Hardscaping, Patios
  • Home
  • Services/Photos
    • Hardscaping >
      • A Flagstone Walkway -- The Process
      • Stone Steps -- The Process
    • Wood Fences
    • Exterior Carpentry
  • About
  • Community

Super Bowl Gumbo Recipe

1/31/2014

1 Comment

 
Picture
The biggest non-official US Holiday is upon us once again – I’m talking about Super Bowl Sunday of course.  And even though my hometown Eagles didn’t make the big game (again) this year, it’s still time for me to break out the apron and chef up something special for the big game.

This year I’ve decided it’s time for some Gumbo.  I usually reserve this recipe for Mardi Gras, or at least a year when the Super Bowl is held in New Orleans, or the off chance that the New Orleans Saints make the big game.

But I’ve been jonesing for some good gumbo as of late, so there’s no time like the present.  Crank up a good New Orleans music playlist – Dr. John, The Meters, Professor Longhair to name a few, and let’s get cooking.

Ingredients:
1 cup olive oil
1 cup flour
2 large onions, chopped
3 bell peppers, chopped
4 ribs celery, chopped
A liberal amount (depending on taste) of whole garlic cloves
4 quarts chicken broth
2 bay leaves
1 teaspoon cayenne pepper
1 teaspoon celery seed
1 teaspoon coriander
1 teaspoon dried thyme
Salt and pepper to taste
Tobasco to taste
Approximately 1.5 lbs chicken thighs
Approximately 1.5 lbs Andouille sausage, chopped
Approximately 1.5 lbs shrimp, peeled
Approximately 1.5 lbs clams, whole in shell

Prep and chop all veggies and have on standby in a large bowl.  Now take your biggest heaviest pot and begin by making the roux.  Heat the oil in the pot on medium-high heat, and add the flour, stirring continuously.  Use a wood spoon to mix – plastic spoons will melt (not that I’ve ever experienced that, ahem …).  Be prepared to spend a good 10 to 15 minutes stirring the roux.  Walk away for just a minute or two, and you’ll have a burnt flour mess on your hands.

A good New Orleans style roux will have a peanut butter color to it when its ready.  A few more minutes of stirring will result in a more Cajun style roux, approximating the color of milk chocolate.  I like the darker roux personally, but if you’re new to the game or are afraid of burning the roux, the lighter roux will work fine.  Roux-making is an acquired skill, and perhaps the trickiest part of this recipe.

Once your roux is ready, add the chopped veggies to the pot, stirring as you add to flash cook the veggies and stop the roux from continuing to cook or burn.  Stir for just a minute or two more, until all the veggies are coated with the roux.  Reduce heat to medium-low.

Add the chicken broth, spices, chicken, sausage, shrimp and clams.  Let the pot simmer for a few hours, occasionally skimming off any excess fat or grease as the meats cook. 

You’re pretty much done at this point.  Once the gumbo is ready, serve and enjoy.  The gumbo can be served over a nice piece of sourdough bread (or bread bowl), or over rice if you prefer.  And of course, with a nice IPA.

And if you bring this to a Super Bowl party, you’ll be the hit of the party.  Trust me!

Enjoy the big game, no matter who you’re rooting for, or what your level of interest is.  If nothing else you'll have an awesome meal to enjoy!

1 Comment

Making a Grill Out of a 55-Gallon Drum.  A Hybrid Propane Wood Smoker Project

9/13/2013

14 Comments

 
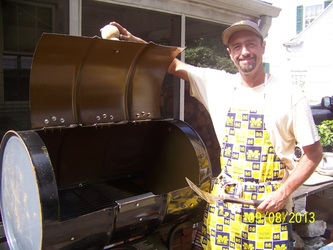
PictureMe and My New Grill!
This is one of those projects that’s been on my life bucket list for some time – building my own grill out of a reclaimed 55-gallon drum.

The seed for this project was actually planted some time ago.  With a wife from the barbecue capitol of the world, Memphis Tennessee, and a palate that seems to be constantly attracted to some of the world’s best street food, I’ve seen some awesome grills and smokers over the years. Grills on trailers for barbecue cook-offs, grills made from old beer kegs, gas tanks, even some made out of old cars.  Heck, even my own family on my mom’s side made some home-made grills on the banks of the mighty St. Joe’s river in Elkhart, IN.  So it’s kind of in the blood.

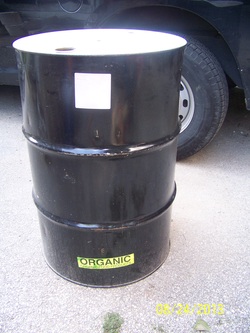
PictureThe Unaltered Food-Grade Drum
So the idea had been festering for some time.  And when our old 13-year-old store-bought gas grill finally bit it a few weeks back, instead of trying some spot repairs and part replacements as I’ve done in the past, it was time to pull the trigger on the new grill.

Before I get into the how-to, I should share a bit about my grilling preferences.  With family lineage in Memphis and a taste for good barbecue, part of me is really drawn to the all-day, slow smoked, wood-fired smokers.

But the realist in me also realizes that I work and have about a billion responsibilities, so slow-smoking a rack of ribs on a Tuesday evening just isn’t in the cards. Slapping burgers on a propane grill fits much better into my schedule.  So what to do?  I wanted the ability to slow-smoke some good ‘cue on a football Saturday afternoon, but also to whip up some simple hot dogs before soccer practice on Thursday night.

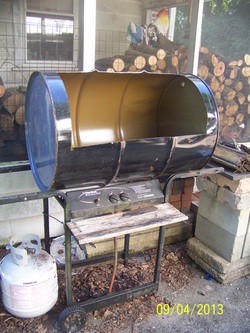
So the solution?  A hybrid, with enough room on one side to throw in some pieces of wet hickory when the time allows, but with a propane set-up on the other side for those weeknight quick-and-easy’s.

What you need:
One 55-gallon drum (sealed ends, food grade)
A grinder or metal cutting saw
Three door hinges
Approximately (30) ¼” x 1” hex bolts, with nuts and washers
Approximately 6’ of 1” angle-iron
One wood finial fence postcap
One propane burner replacement piece
One propane burner heat shield
Propane ceramic briquets
Replacement grill grates to fit

Picture
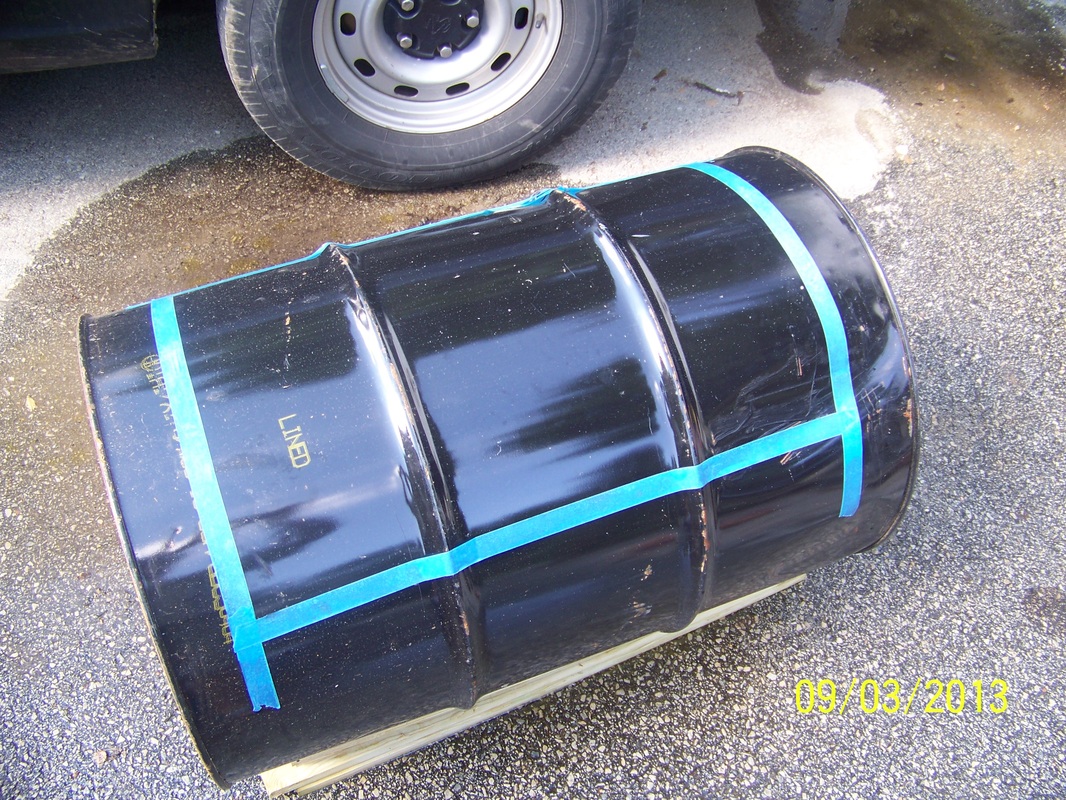
Mark Your Lid Locations
Picture
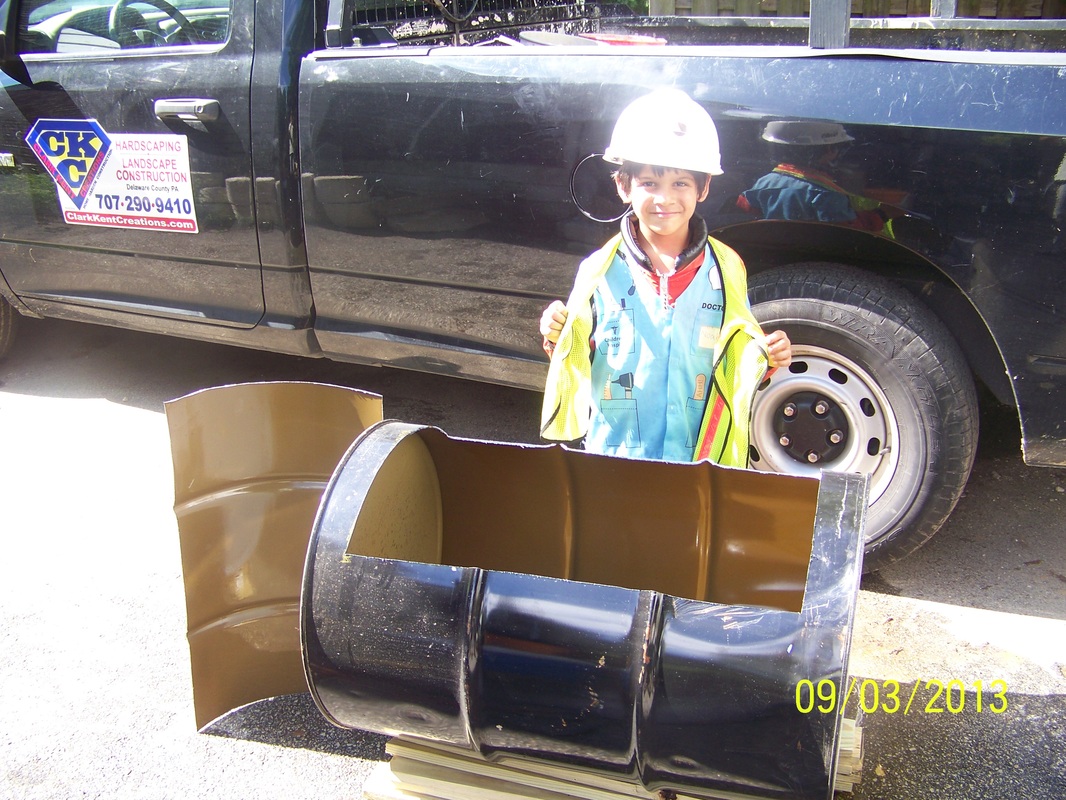
A Properly Safety-Compliant Helper
PictureThe Empty Barrel on the Stand
What to do:

First, get your hands on a 55-gallon drum.  If you have the time and you’re diligent in your search, you can probably find a free one from an automotive service center or food processing plant.  My time and patience were lacking, so I found one on Craigslist for $20.  I could have paid $10, but splurged for the “Food Grade” barrel, as I really wasn’t in the mood to be tasting oil on all my food for the next few years.  Make sure it is metal, not plastic (duh).  Also make sure it is
“sealed” meaning the circular ends aren’t removable.

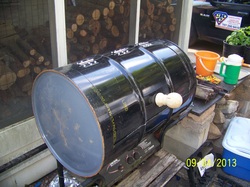
Next, mark out and cut your door opening.  There’s a few ways I could have done this, but I chose to keep the circular ends intact, partially not to compromise the stability of the barrel, and partially to keep options open if I ever want to install an upper grill rack down the road. I marked out the door with masking tape to ensure good straight lines, and used a grinder to make the cuts.

Once the door panel is cut out, attach the three hinges to door using the ¼” bolts.  Mark your hole locations, pre-drill holes, and tighten the bolts using the nuts and washers.  Once all three hinges are secured on the door, hold in place and mark the hinge locations on the barrel itself.  Pre-drill your holes (need to be precise with the locations so everything lines up), insert bolts and attach the hinges.  

You’ll also want to easily open your door, so it will need some handles.  You don’t want metal handles, as they will conduct the heat. There were some wood cabinet handles at the box store that could have worked, but they weren’t meant for outdoor use, so I was concerned about rot.  So I improvised again, using a pressure-treated finial postcap.  I simply drilled a hole through the door and secured the knob with a small lag screw from the inside.  I used one, centered on the door, depending on preferences you may want two.  You now have a functioning door.

PictureAttach Door with Hinges and Install Knob
The stand.  I have to admit, I cheated on this one bit, as the stand from our old store-bought grill was still perfectly functional, and the barrel fit quite nicely on the frame.  If I had to build my own stand, I probably would have used threaded metal pipes to construct a simple stand.  But I didn’t have to, so there.  My guess is you could probably find something at your house that works – shopping carts, old metal shelving, old trailers – you’ll figure it out.

I now placed the barrel on the stand sideways with the door on top, circular ends on either side, and drilled a few drain holes in the bottom of the barrel.  This will help for airflow, and allow for drainage if you ever leave the grill open in the rain, or spill barbecue sauce into the grill.

PictureCut Hole in Bottom for Propane Access and Drainage
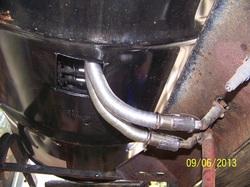
If you’re just going the wood route, you can skip this step, but if you’re retrofitting some propane parts, you’ll need to cut a small opening in the bottom of the barrel (amongst the drain holes) to allow for the burner to be installed, and the feeder pipes to access the main propane supply and control knobs.  Again, I used my grinder to cut out a hole roughly 3”x4” to allow both feeder pipes to fit through comfortably.  
 
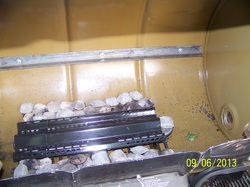
The big box stores sell a wide assortment of after-market replacement parts for propane grills. Just a find a burner that fits the barrel, and a heat shield that fits the size of the burner.   (The heat shield prevents the flame from torching the food, redistributing the heat to the ceramic briquettes).

PictureThe Propane Burner, and Angle-Iron Grate Supports
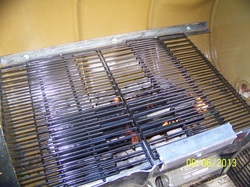
You’re getting close now. All you’re missing is the cooking grate. I ended up purchasing two of the largest size grates I could find at the box store, but if you have access to any sort of metal working shop you can probably find some sturdy steel mesh that would work just fine.  Regardless of what you go with, get the grate first, as you’ll need it to install your bracing.

Place your grate down into the barrel over the propane burner apparatus.  Check for level both front to back and side to side.  Ideally, you should have about 4” between the top of the heat shield and the grate.  Once you position the grate into the location you want, mark the location of the grate on the inside of the barrel with a pencil.  Now remove the grate form the barrel.

PictureFire!! Inaugural Meal? ... Chicken Kabobs.
Take your angle iron, and cut two equal length pieces that will run the length of the barrel (3’ +/-). Now drill three ¼” holes through one side (flange) of the angle iron, one on either end and one in the middle. Hold your drilled angle iron piece up against the line you already drew on the inside of the barrel, and mark the hole locations.  This may require a helper to hold the piece, making sure your hole marks line up exactly with the holes on the angle iron.  Now drill the holes through the barrel itself, and fasten the angle iron to the inside of the barrel using the ¼” bolts.  Repeat for the front and back.  When you’re done, you’ll have two metal “shelves” running the full length of the barrel, both front and back.  Simply place your grate resting on both sides of the angle iron, and you are good to go!

I’m thrilled to cross this project off the bucket list for a number of reasons.  Go look at a box store or home center, and you’ll see a whole assortment of grills ranging from $300 on up.  The big ones that have enough space to do what I want (you know, that whole pig roast every red-blooded male dreams about …) start at $600 at least, and run far, far upwards of that number.  Mine?  About $65 for the barrel conversion, and about $55 for the propane burner equip. Not bad.  Plus, it’s way, way, way cooler in my opinion.

I still may make a tweak or two, and who knows, maybe I’ll even play around making a few more for some friends.  If I can squeeze it in between getting my grill on …

Interested in something like this for your outdoor living space?  Give me a call.  We’ll talk.

14 Comments

Snack Break!  Super Bowl Chili Recipe

2/1/2013

4 Comments

 
Picture
Super Bowl Snacks -- Where to Begin!
The big day is here. Regardless of whether you’re a die-hard fan, a casual observer, or a non sports fan altogether, its hard not to be aware that Super Bowl Sunday is upon us.  In a way its sort of become the largest of the non-official US Holidays.

And regardless of whether you’re rooting for the San Francisco 49ers or Baltimore Ravens, nearly everybody likes to partake in some form of Super Bowl Celebration.


It’s a chance for me personally to showcase some of my favorite Super Bowl snacks.  And one of my favorite Super Bowl snacks is my award-winning Chili recipe.

The Super Bowl thing is really just an excuse.  In fact this chili recipe is one of my favorite winter meals period.  Nothing better than a large pot of aromatic chili simmering on the stove all day, a fire in the fireplace, maybe a good football game on the TV or solid playlist on the stereo, and a hearty wintertime meal.

Like a good landscape, good recipes are, in my opinion, to be shared and enjoyed.  And for those of you who think my blog needs to have a bit of a landscape tie-in, well the tomatoes are the excess of last year’s homegrown tomato crop, so there you go.

With no further build-up, here goes …

Ingredients:
4 Tbsp Flour
3 Tbsp Chili powder
4 tsp Dry mustard
2 tsp Oregano
2 tsp Black pepper
2 tsp Crushed red pepper flakes
1 tsp Cayenne pepper
1 tsp Celery seed
½ tsp Cumin
½ tsp Thyme
½ tsp Corriander
4 lbs Ground Beef
2 14-oz cans Kidney beans
4 14-oz cans tomatoes (or stewed fresh tomatoes to substitute)
5 large Bell peppers
Jalapenos to taste (10 +/- depending on spice preference)
2 large onions
Approx 15-20 peeled garlic cloves

Start by taking all of the spices and mixing them together in a jar or medium-sized container.  Next chop up your veggies and put them in a large pot over very low flame, along with the beans.  While the veggies are simmering, take the beef and start frying it up in a separate pan.  When the beef is just about fully cooked, drain out the grease and add a decent quantity of the spice mixture in with the beef.  Continue to cook for an extra minute or two until the beef is fully cooked, and add the beef in with the veggies.  Next I typically add a bit of water to the empty frying pan and continue to cook allowing any spice residue to be removed from the bottom of the pan. Add the water/spice residue mix back to the large pot.

That’s basically it. Continue to cook the large pot over low flame for about 5 to 6 hours, until everything is cooked and the mix has begun to reduce.  I’ll usually check on the mix regularly to stir, and add any remaining spice mix from the jar.  The spices should be fully added as the chili cooks down.

A quick heads-up, the quantities listed above yield a boatload of chili.  I like to make it with the intention of having lots of leftovers for the upcoming week or two.  Make sure you have a large pot that can handle the quantity, or if you’d prefer, cut all the above quantities in half.  Just make sure you keep the ratios the same.

Enjoy!  Crack open a good IPA, serve with your choice of chips, bread or crackers, some shredded cheese or sour cream, and dig in!  There hopefully isn’t too much more winter weather to stomach, and this chili should bridge you over until spring weather settles in!

4 Comments

Happy Turkey Day!

11/16/2012

1 Comment

 
Picture
If you’re like me, then you’ll find it hard to believe that Thanksgiving is upon us.

Personally, it seems like only yesterday that we were gearing up for the 2012 season, preparing estimates, setting the project calendar for the year and preparing to knock out some really nice projects.

It’s still a bit too early to recap the entire season – we’re still hard at work on some remaining projects before the winter arrives.

But Thanksgiving is a welcome opportunity to pause, take one deep breath before the final push of the season, and spend some quality time with friends and loved ones.

There’s a number of things that I really like about Thanksgiving as a Holiday, mostly centered around the four F’s– Food, Family, Friends and Football.  With the possible exception of the Fourth of July, Thanksgiving is perhaps the most American of Holidays, a holiday in which all Americans, regardless of age, religion, political leanings, or any other personal differences can all relax, enjoy quality time with loved ones and give thanks for what we have.  All with little pressure or financial expectations.

For our family personally, we celebrate the Holiday at home with my parents who live nearby.  The food preparation typically starts this weekend, culminating in an all-day gluttony of food on Thanksgiving Day.  In addition to the traditional turkey and fixings, we also supplement the food frenzy with my homemade crabcakes, mussels, fine fruits and cheeses, and of course the necessary assortment of pies.  Usually with some good wine and local craftbrews for those who care to partake. (Side note:  For craft beer lovers out there, I strongly recommend Dogfish Head’s Punkin Ale – an excellent seasonal brew from our brewing friends down in Delaware!)

And of course, no Thanksgiving weekend would ever be complete, at least not for us University of Michigan alumni, without the annual rivalry game between UM and Ohio State.  Go Blue!! (Another side note – we did a really nice patio project for a couple of OSU alums this summer.  So if you guys are reading this – you know who you are – I really enjoyed working with you and getting to know you better this summer, but I’m going to have to do some OSU bashing this weekend!  It’s in my DNA and I wouldn’t be true to myself if I didn’t. But we can still be friends once the game is over! – Just not this weekend!)

Anyway, whatever your traditions, and whatever college team you root for (even OSU, I guess…) I hope everybody has a great Turkey Day.  Happy Thanksgiving!

1 Comment

Tomatoes, Tomatoes, and More Tomatoes!!!

8/24/2012

6 Comments

 
Picture
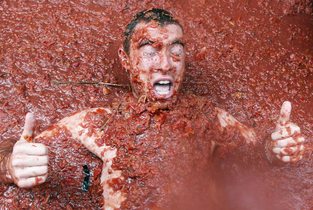
Not Actually Me -- But it Sure Could Be!!
I have to admit, I’m swimming in tomatoes right now.

Well almost.  As tempting as it sounds to replicate the annual Spanish Tomatina Festival, where revelers take over the city to enjoy a city-wide tomato fight in Bunol, Spain, I usually like to find a slightly more productive use for the fruits.  Although we certainly have enough ammo to participate, and it does sound fun.
 
No, we like to eat our tomatoes.  And there is nothing that compares to fresh home-grown tomatoes. The mass-produced grocery store varieties don’t even compare.


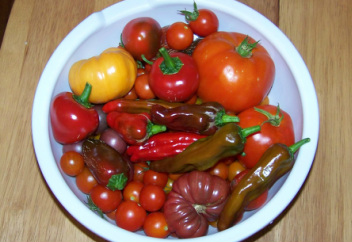
Every May, I put about 30 tomato plants in our garden, consisting of about 8 to 10 various varieties.  And every July, as the plants start to fill out the garden I begin to think that maybe I went a little overboard.  And every August my concerns are validated as we harvest bowl after bowl of the juicy fruits on a daily basis.  That’s where we are now.

So what to do with these juicy little fruits?

Our entire diet from the beginning of August through about the mid to end of September is basically a vehicle for tomato consumption.  Salads, burgers, sandwiches, morning bagels, omelettes – you name it.  Tomato me up.

Picture
A Typical Daily Harvest in August
About half of the crop ends up getting cooked down and frozen – the base for mid-winter pasta sauces and chili cook-offs (If you’re lucky I just may share my award-winning chili recipe come this winter).

Sheila and I are both afficianados of good bar food.  I’m not talking about the frozen breaded fried stuff, but rather good simple recipes using fresh ingredients.  Two recipes in particular that are staples in our house during tomato season are our home-made nachos, and bacon bruschetta.  
 
Lucky for you, I’m in a sharing mood, so here’s our recipes:


 Nachos
1 onion
15-20 whole garlic cloves
5 large bell peppers (it’s also the heart of pepper season right now, so feel free to play around with other pepper types too!)
10-15 jalapenos (depending on your taste for spice)
2 lbs of ground beef
2 cups of black beans
Tortilla Chips (Our local market makes homemade chips -- Nothing compares!!)
Shredded Cheese
Tomatoes, tomatoes, tomatoes
Avocado

Chop up the onions, peppers and garlic and sauté in olive oil.  Add ground beef and black beans, and continue to cook until meat is cooked.

On a large cookie sheet, place an ample of amount of chips atop a piece of foil. Layer with cheese, the cooked “slop” (We love this term for a lot of dishes, as unattractive as it may sound), more chips, cheese, slop, etc.

Cook at a low temperature in the oven for about 5 minutes – just enough to melt the cheese.  Slide the whole aluminum foil sheet, chips, slop and all, right onto a large serving plate. Once it’s on the plate, dump a boatload of sliced tomatoes and the sliced avocado on top.  MMmmmmm.  Yummy nacho-y goodness.  Enjoy! 
 
** This recipe feeds a lot!  You’re going to have leftover slop most likely. The more the merrier.  That means you get to have more nacho dinners (and use up more tomatoes) in the days to come.

Bacon Bruschetta

1 lb bacon
Olive Oil
Diced garlic
Basil (Oh yeah, it’s basil season too!)
Tomatoes, tomatoes, tomatoes.

This recipe is so easy it’s ridiculous.  Definitely our go-to dish for picnics and get-togethers.  And if you happen to be a vegetarian, just omit the bacon – still awesomely delicious.

Cook up the bacon and let cool.  Slice and chop up an ample amount of tomatoes and put in a serving bowl.  Take about two large stalks of basil and cut up the leaves into the bowl with the tomatoes.  Cut up your bacon into small 1” pieces and then add a spoonful or two of the diced garlic.  Pour about ¼ cup of olive oil over the whole bowl, and toss thoroughly.  Serve on some toast points, and you’re good to go!

So those are just two of the many uses for tomatoes we enjoy during this bountiful time of year.  If anybody else has any good suggestions, I’m all ears.

"One day there were three tomatoes walking down the street, a mama tomato, a daddy tomato and a baby tomato. Baby tomato is walking too slowly, so the daddy tomato goes back, steps on him and says 'ketchup!' "
 
– Uma Thurman, Pulp Fiction


6 Comments
    Picture

    Company

    Clark Kent Creations, LLC is a full-service landscape construction company servicing the Pennsylvania communities of Delaware County, Chester County, The Main Line, and the University City, Art Museum, and Manayunk/Roxborough neighborhoods of Philadelphia.  In addition to this blog page, additional information regarding the company and our services can be found on the subsequent pages of the site.
    Picture

    Author

    Clark Linderman is the president of Clark Kent Creations, LLC, a landscape construction company based in Swarthmore, PA.  He is a proud graduate of the University of Michigan.  In addition to his passion for all things outdoors, he counts Michigan football, Phillies baseball, Superman memorabilia, Memphis R&B music, and good craft brews among his many interests.  He currently resides in Swarthmore with his wife, Sheila, two sons, his dog Krypto, and a really, really messy garage full of work supplies and toys.

    Picture
    Contact Us:
    Clark Kent Creations, LLC
    Swarthmore, PA
    Design and Construction to Maximize Your Outdoor Experience

    707-290-9410
    [email protected]
    Serving Delaware County, PA

    View my profile on LinkedIn

    Categories

    All
    Business And The Front Office
    Carpentry
    Environmental Issues
    Fencing
    Guest Posts
    Hardscaping
    Inspiration And Design Ideas
    Places & Local Interest
    Ramblings
    Seasonal
    Snack Break
    Water Features

    Archives

    July 2015
    September 2014
    February 2014
    January 2014
    December 2013
    November 2013
    October 2013
    September 2013
    August 2013
    July 2013
    June 2013
    May 2013
    April 2013
    March 2013
    February 2013
    January 2013
    December 2012
    November 2012
    October 2012
    September 2012
    August 2012
    July 2012
    June 2012
    May 2012
    April 2012
    March 2012
    February 2012
    January 2012
    December 2011

    Like my Blog?

    If you like the content of my blog posts, here are a few other blogs that I check in on regularly:

    Stone Soup:  A Master Stone Mason shares his craft.

    Arcadia Gardens:  Plenty of great tips about horticulture and landscape design.  A great blog (even though she's an MSU Spartan!)

    Revolutionary Gardens:  A Virginia-based landscape designer shares his work and ideas.

    Rockin Walls:  A certified dry stone mason from Maryland shares his projects and tricks of the trade

    If you have or know of a blog that you think I might be interested in, just let me know.  If I like it I just may add it to the list!

    RSS Feed

    All content ©2013
    Clark Kent Creations, LLC
Proudly powered by Weebly