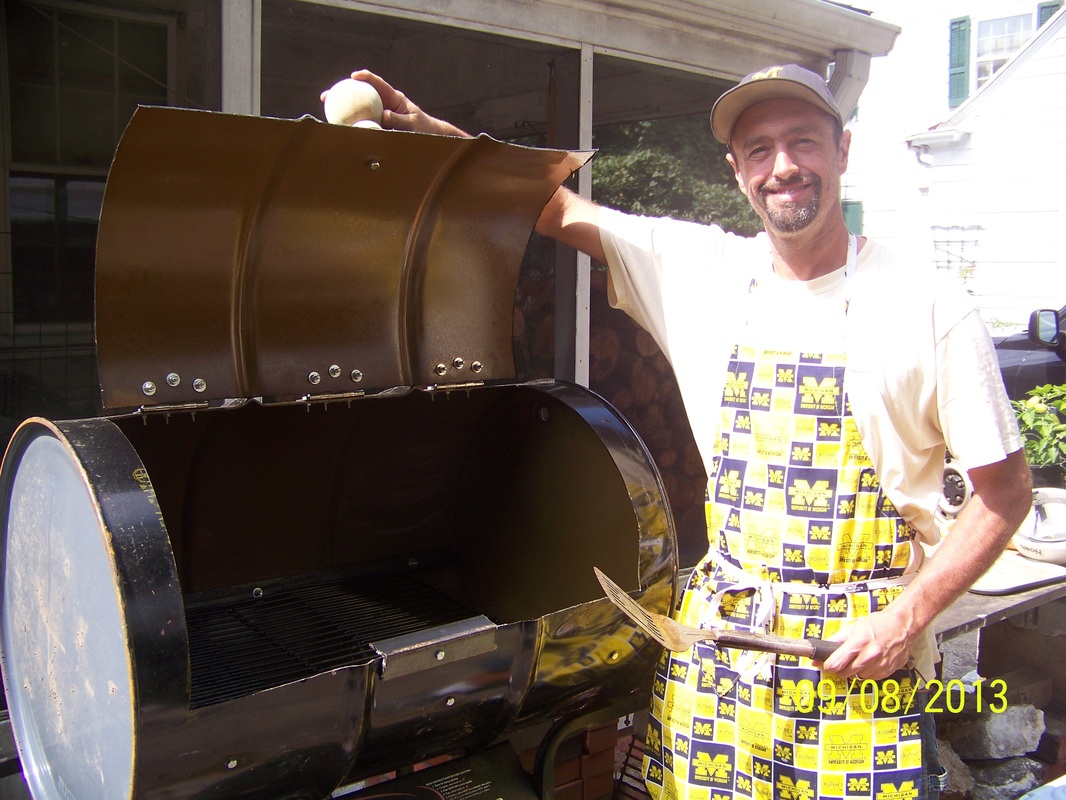
 Me and My New Grill!
 This is one of those projects that’s been on my life bucket list for some time – building my own grill out of a reclaimed 55-gallon drum.
The seed for this project was actually planted some time ago. With a wife from the barbecue capitol of the world, Memphis Tennessee, and a palate that seems to be constantly attracted to some of the world’s best street food, I’ve seen some awesome grills and smokers over the years. Grills on trailers for barbecue cook-offs, grills made from old beer kegs, gas tanks, even some made out of old cars. Heck, even my own family on my mom’s side made some home-made grills on the banks of the mighty St. Joe’s river in Elkhart, IN. So it’s kind of in the blood.
The seed for this project was actually planted some time ago. With a wife from the barbecue capitol of the world, Memphis Tennessee, and a palate that seems to be constantly attracted to some of the world’s best street food, I’ve seen some awesome grills and smokers over the years. Grills on trailers for barbecue cook-offs, grills made from old beer kegs, gas tanks, even some made out of old cars. Heck, even my own family on my mom’s side made some home-made grills on the banks of the mighty St. Joe’s river in Elkhart, IN. So it’s kind of in the blood.
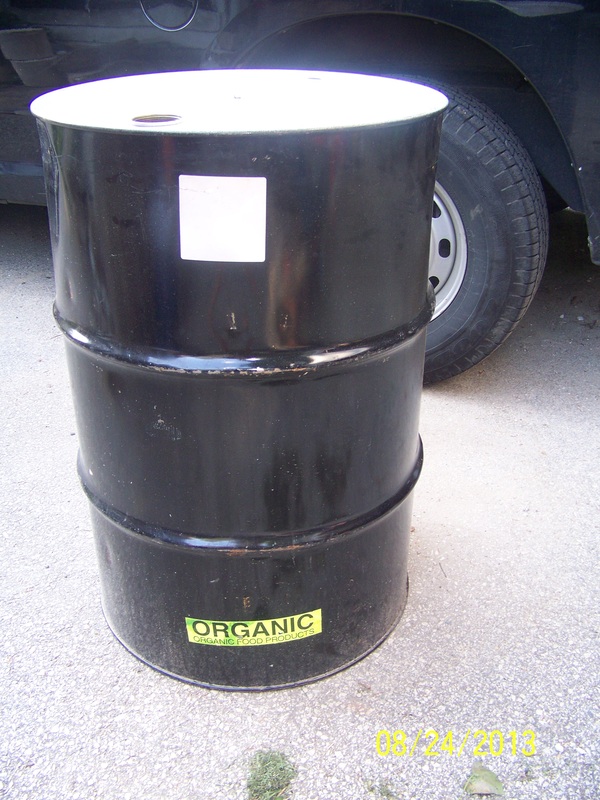 The Unaltered Food-Grade Drum
 So the idea had been festering for some time. And when our old 13-year-old store-bought gas grill finally bit it a few weeks back, instead of trying some spot repairs and part replacements as I’ve done in the past, it was time to pull the trigger on the new grill.
Before I get into the how-to, I should share a bit about my grilling preferences. With family lineage in Memphis and a taste for good barbecue, part of me is really drawn to the all-day, slow smoked, wood-fired smokers.
But the realist in me also realizes that I work and have about a billion responsibilities, so slow-smoking a rack of ribs on a Tuesday evening just isn’t in the cards. Slapping burgers on a propane grill fits much better into my schedule. So what to do? I wanted the ability to slow-smoke some good ‘cue on a football Saturday afternoon, but also to whip up some simple hot dogs before soccer practice on Thursday night.
So the solution? A hybrid, with enough room on one side to throw in some pieces of wet hickory when the time allows, but with a propane set-up on the other side for those weeknight quick-and-easy’s.
What you need:
One 55-gallon drum (sealed ends, food grade)
A grinder or metal cutting saw
Three door hinges
Approximately (30) ¼” x 1” hex bolts, with nuts and washers
Approximately 6’ of 1” angle-iron
One wood finial fence postcap
One propane burner replacement piece
One propane burner heat shield
Propane ceramic briquets
Replacement grill grates to fit
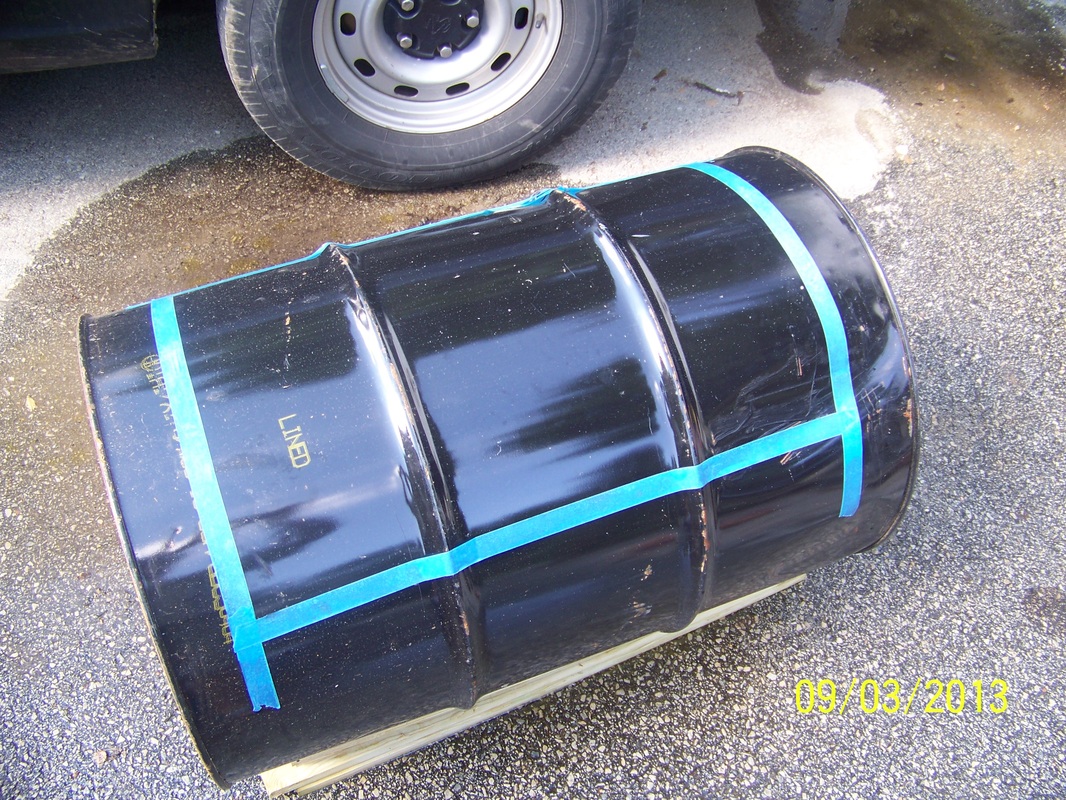
Mark Your Lid Locations
| 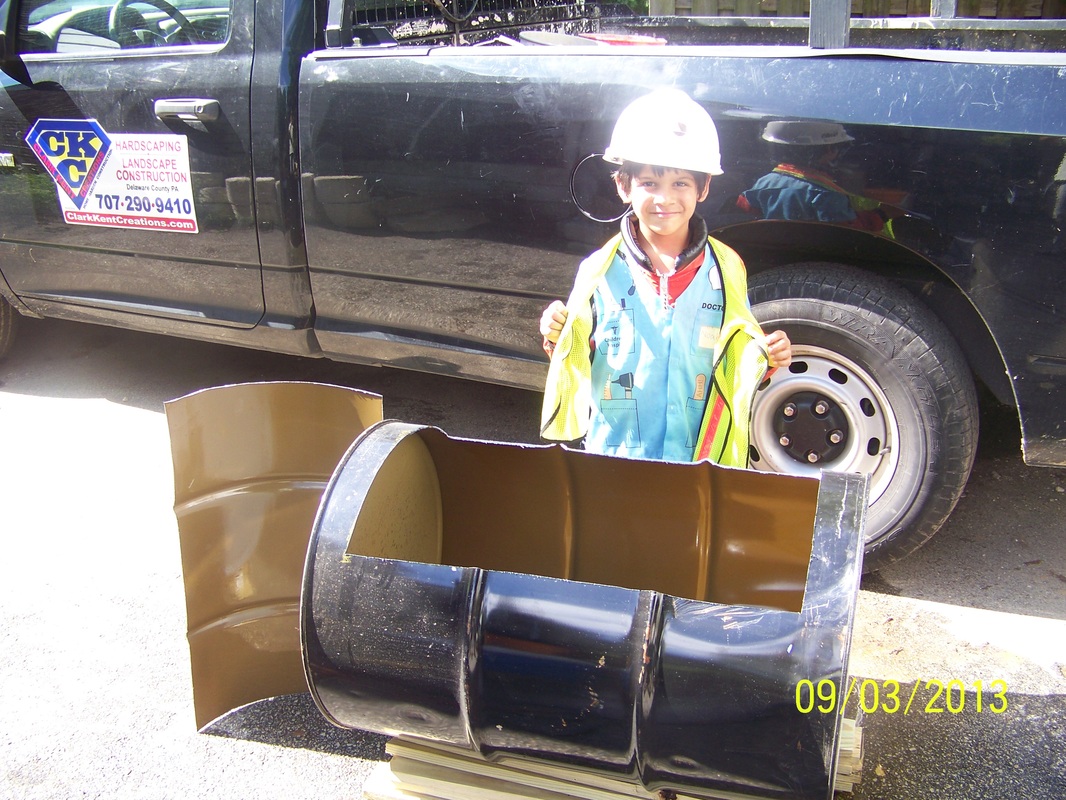
A Properly Safety-Compliant Helper
|
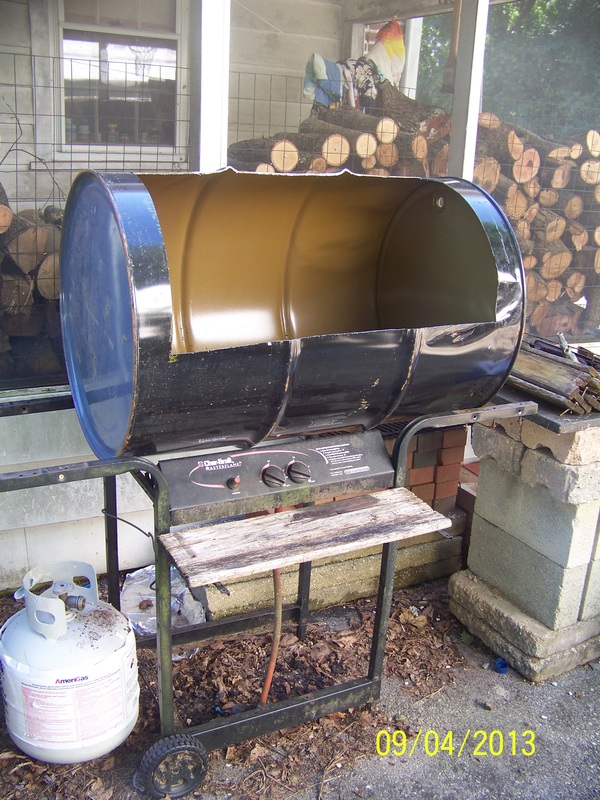 The Empty Barrel on the Stand
 What to do:
First, get your hands on a 55-gallon drum. If you have the time and you’re diligent in your search, you can probably find a free one from an automotive service center or food processing plant. My time and patience were lacking, so I found one on Craigslist for $20. I could have paid $10, but splurged for the “Food Grade” barrel, as I really wasn’t in the mood to be tasting oil on all my food for the next few years. Make sure it is metal, not plastic (duh). Also make sure it is
“sealed” meaning the circular ends aren’t removable.
Next, mark out and cut your door opening. There’s a few ways I could have done this, but I chose to keep the circular ends intact, partially not to compromise the stability of the barrel, and partially to keep options open if I ever want to install an upper grill rack down the road. I marked out the door with masking tape to ensure good straight lines, and used a grinder to make the cuts.
Once the door panel is cut out, attach the three hinges to door using the ¼” bolts. Mark your hole locations, pre-drill holes, and tighten the bolts using the nuts and washers. Once all three hinges are secured on the door, hold in place and mark the hinge locations on the barrel itself. Pre-drill your holes (need to be precise with the locations so everything lines up), insert bolts and attach the hinges.
You’ll also want to easily open your door, so it will need some handles. You don’t want metal handles, as they will conduct the heat. There were some wood cabinet handles at the box store that could have worked, but they weren’t meant for outdoor use, so I was concerned about rot. So I improvised again, using a pressure-treated finial postcap. I simply drilled a hole through the door and secured the knob with a small lag screw from the inside. I used one, centered on the door, depending on preferences you may want two. You now have a functioning door.
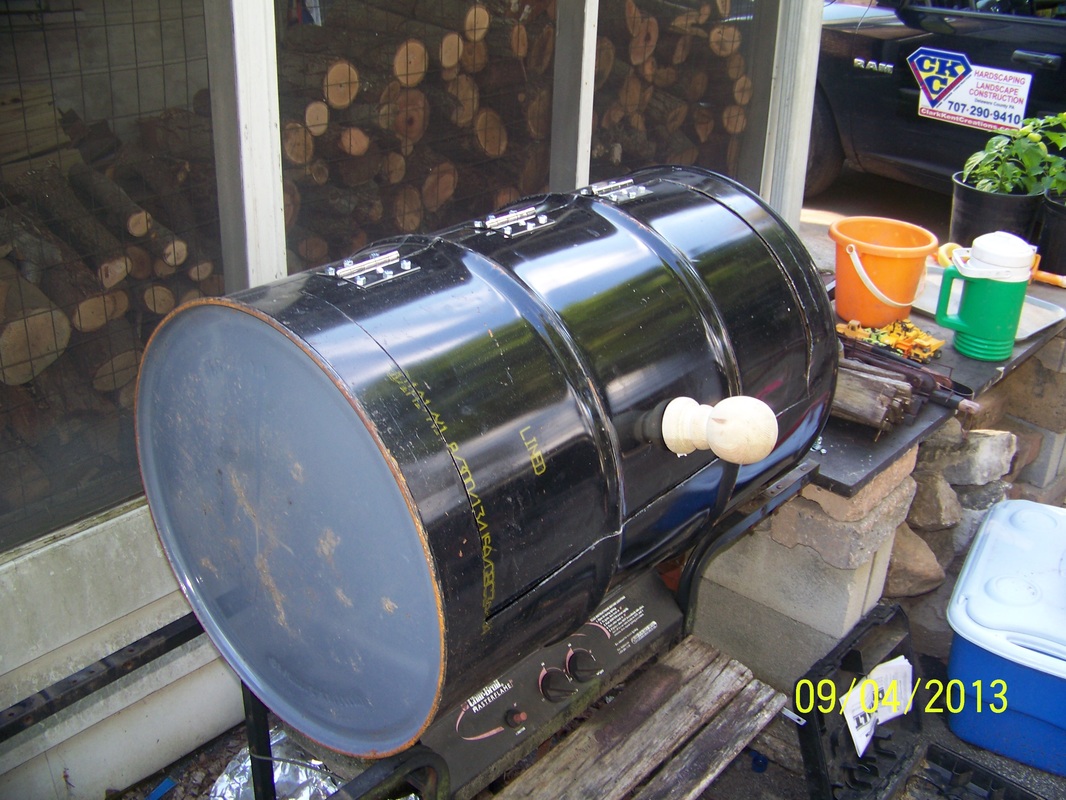 Attach Door with Hinges and Install Knob
 The stand. I have to admit, I cheated on this one bit, as the stand from our old store-bought grill was still perfectly functional, and the barrel fit quite nicely on the frame. If I had to build my own stand, I probably would have used threaded metal pipes to construct a simple stand. But I didn’t have to, so there. My guess is you could probably find something at your house that works – shopping carts, old metal shelving, old trailers – you’ll figure it out.
I now placed the barrel on the stand sideways with the door on top, circular ends on either side, and drilled a few drain holes in the bottom of the barrel. This will help for airflow, and allow for drainage if you ever leave the grill open in the rain, or spill barbecue sauce into the grill.
I now placed the barrel on the stand sideways with the door on top, circular ends on either side, and drilled a few drain holes in the bottom of the barrel. This will help for airflow, and allow for drainage if you ever leave the grill open in the rain, or spill barbecue sauce into the grill.
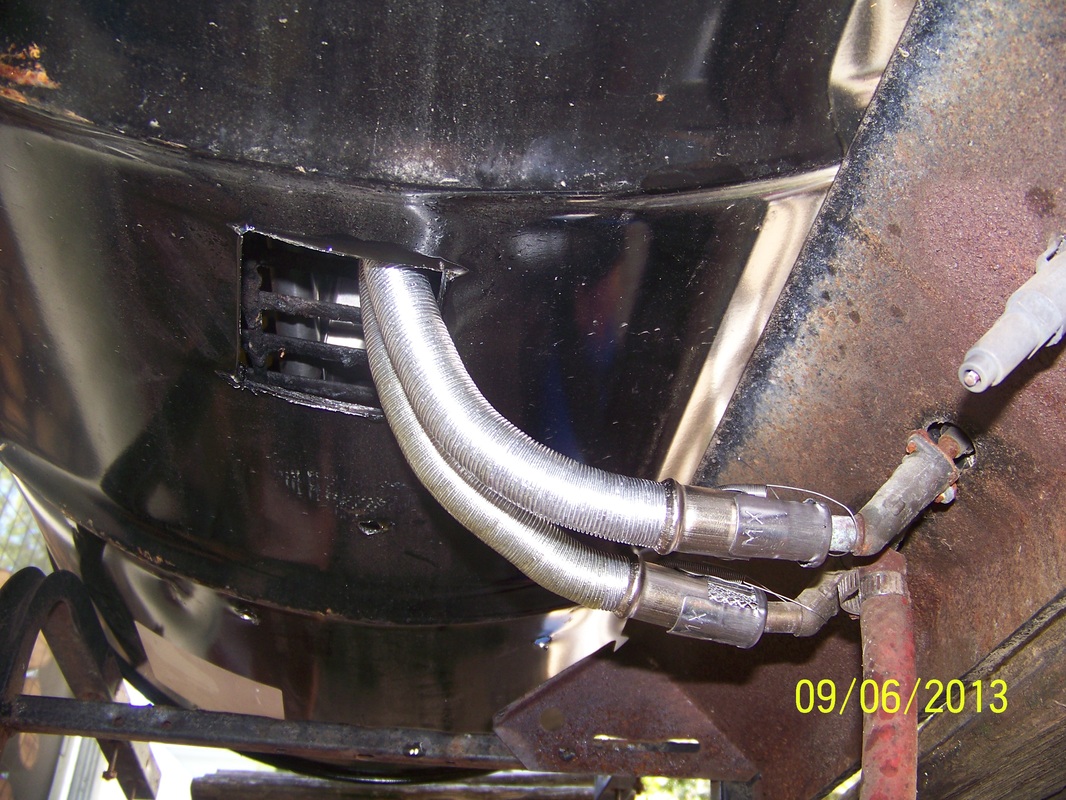 Cut Hole in Bottom for Propane Access and Drainage
 If you’re just going the wood route, you can skip this step, but if you’re retrofitting some propane parts, you’ll need to cut a small opening in the bottom of the barrel (amongst the drain holes) to allow for the burner to be installed, and the feeder pipes to access the main propane supply and control knobs. Again, I used my grinder to cut out a hole roughly 3”x4” to allow both feeder pipes to fit through comfortably.
The big box stores sell a wide assortment of after-market replacement parts for propane grills. Just a find a burner that fits the barrel, and a heat shield that fits the size of the burner. (The heat shield prevents the flame from torching the food, redistributing the heat to the ceramic briquettes).
The big box stores sell a wide assortment of after-market replacement parts for propane grills. Just a find a burner that fits the barrel, and a heat shield that fits the size of the burner. (The heat shield prevents the flame from torching the food, redistributing the heat to the ceramic briquettes).
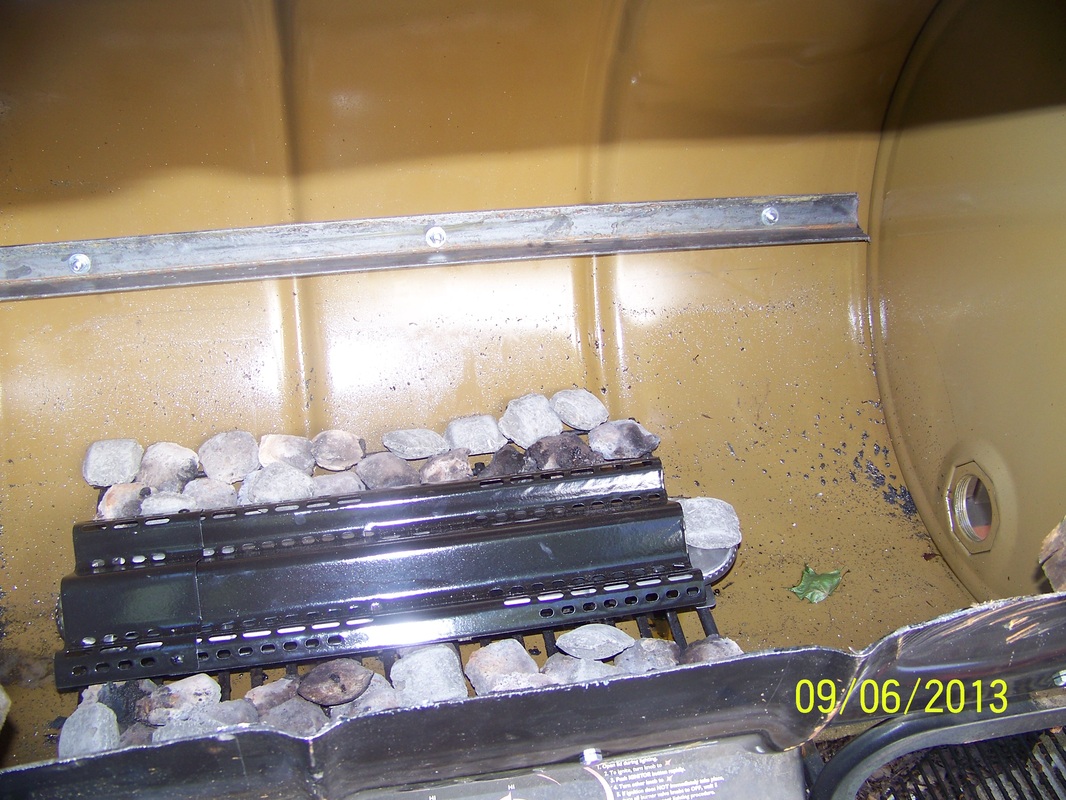 The Propane Burner, and Angle-Iron Grate Supports
 You’re getting close now. All you’re missing is the cooking grate. I ended up purchasing two of the largest size grates I could find at the box store, but if you have access to any sort of metal working shop you can probably find some sturdy steel mesh that would work just fine. Regardless of what you go with, get the grate first, as you’ll need it to install your bracing.
Place your grate down into the barrel over the propane burner apparatus. Check for level both front to back and side to side. Ideally, you should have about 4” between the top of the heat shield and the grate. Once you position the grate into the location you want, mark the location of the grate on the inside of the barrel with a pencil. Now remove the grate form the barrel.
Place your grate down into the barrel over the propane burner apparatus. Check for level both front to back and side to side. Ideally, you should have about 4” between the top of the heat shield and the grate. Once you position the grate into the location you want, mark the location of the grate on the inside of the barrel with a pencil. Now remove the grate form the barrel.
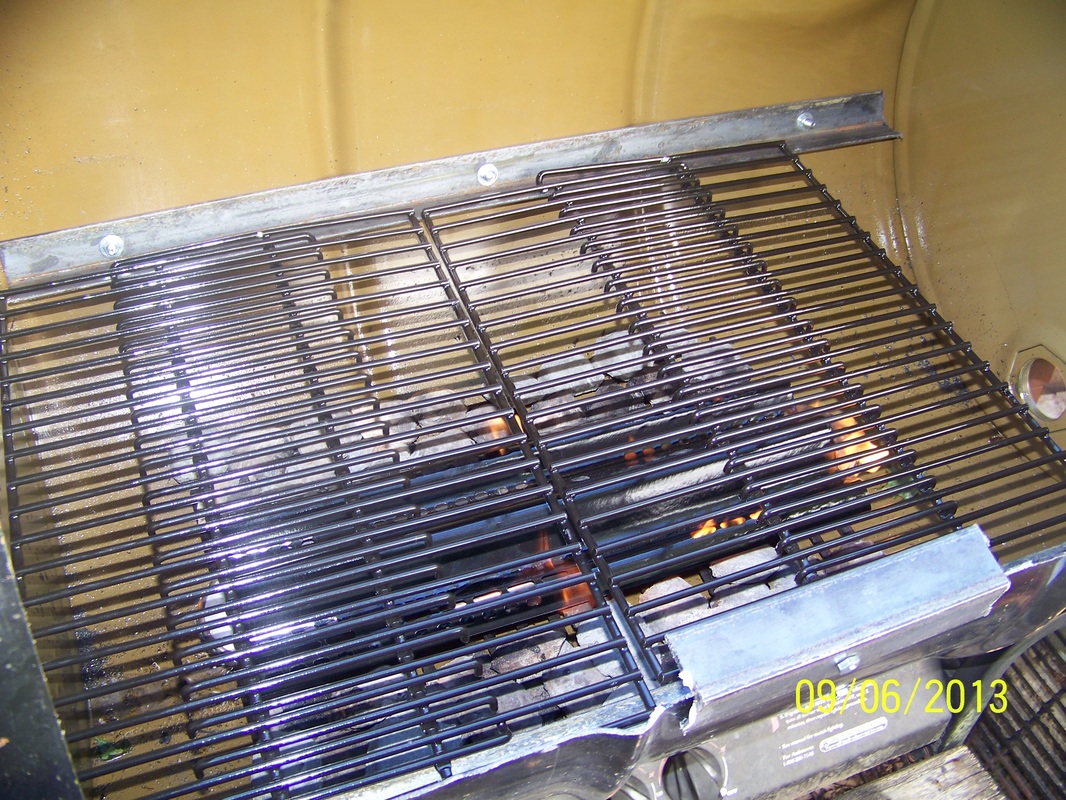 Fire!! Inaugural Meal? ... Chicken Kabobs.
 Take your angle iron, and cut two equal length pieces that will run the length of the barrel (3’ +/-). Now drill three ¼” holes through one side (flange) of the angle iron, one on either end and one in the middle. Hold your drilled angle iron piece up against the line you already drew on the inside of the barrel, and mark the hole locations. This may require a helper to hold the piece, making sure your hole marks line up exactly with the holes on the angle iron. Now drill the holes through the barrel itself, and fasten the angle iron to the inside of the barrel using the ¼” bolts. Repeat for the front and back. When you’re done, you’ll have two metal “shelves” running the full length of the barrel, both front and back. Simply place your grate resting on both sides of the angle iron, and you are good to go!
I’m thrilled to cross this project off the bucket list for a number of reasons. Go look at a box store or home center, and you’ll see a whole assortment of grills ranging from $300 on up. The big ones that have enough space to do what I want (you know, that whole pig roast every red-blooded male dreams about …) start at $600 at least, and run far, far upwards of that number. Mine? About $65 for the barrel conversion, and about $55 for the propane burner equip. Not bad. Plus, it’s way, way, way cooler in my opinion.
I still may make a tweak or two, and who knows, maybe I’ll even play around making a few more for some friends. If I can squeeze it in between getting my grill on …
Interested in something like this for your outdoor living space? Give me a call. We’ll talk.


 RSS Feed