A few weeks ago I highlighted our first big project of the season with some pictures from a dryset flagstone walkway and stone stepper project. I now want to share a composite deck project we just completed.
This project was actually a deck renovation. We were able to maintain most of the original framing and structure while replacing the old 2x4 decking that had definitely seen better days. Fortunately we were able to determine before we started that the original framing and joist structure was still in fine condition.
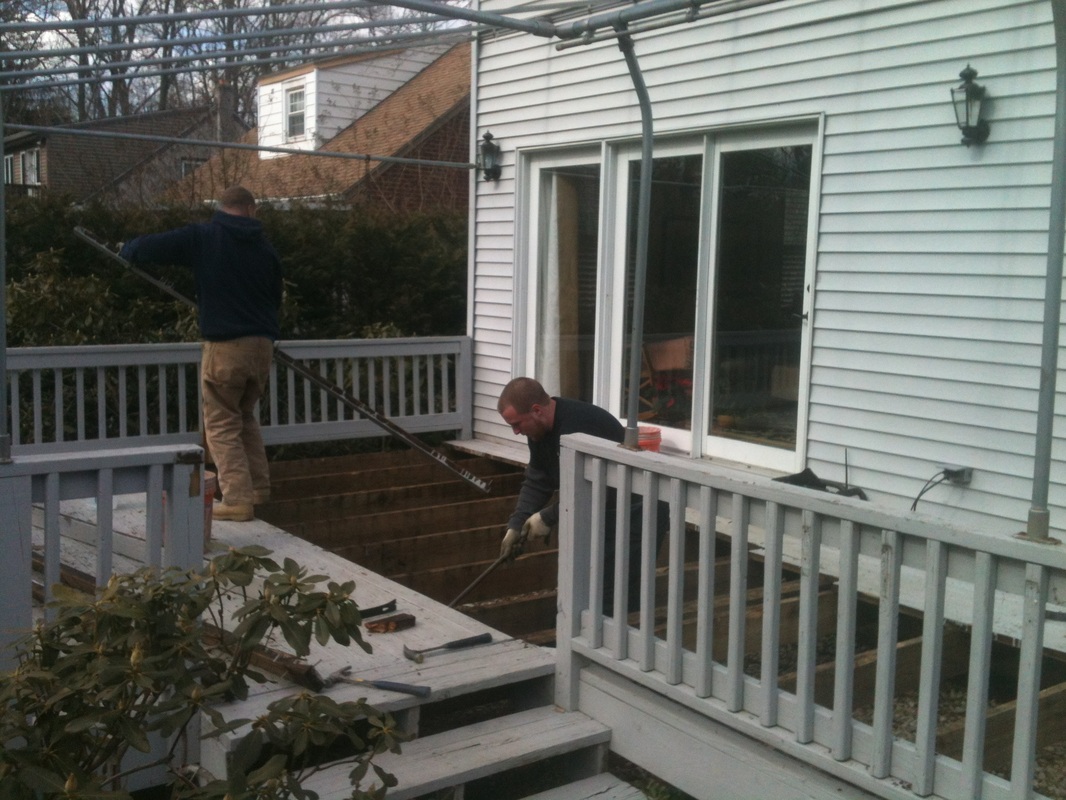
We began by carefully removing the original decking, making sure we didn't damage the joists or any of the framing. Old nails were carefully pulled, the old steps were removed in their entirety, and the railings were gently removed with prybars, making sure no additional damage to the structure was incurred.
Once the decking was removed in its entirety, we re-inspected the framing to make sure that there was no damage to the joists or anything we missed during our initial inspection. Everything checked out AOK, and we were good to go with the new decking.
We did have to make some amendments to the framing, due to the fact that the composite decking we were installing requires a tighter joist spacing than what was originally present. The original joists were set at about 24" on center, a bit wider than I typically would set my joists for any material, but far too wide to accommodate composite materials. The wide spacing did allow us the opportunity to install additional joists at the midpoint of every section to reduce the spacing to less than 12", more than close enough to accommodate the composite decking.

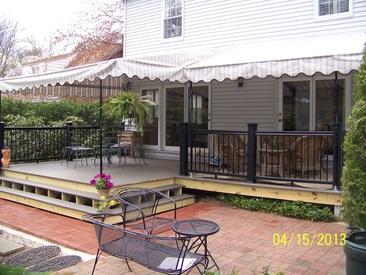
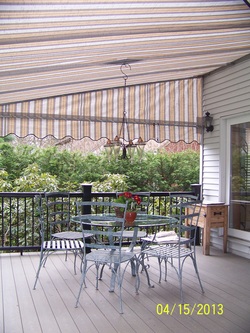
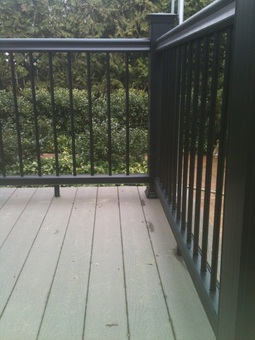
Once the decking was installed, it was on to the railings. For this project we used TimberTech Radiance Rails with round balusters.
We also amended the deck's stairs, eliminating the two narrow sets of steps that originally connected the deck to the lower yard, and replaced them with a single continuous set of steps that wraps around the entire back edge of the deck.
And since we never like to stray too far from our hardscaping roots, we also added on to the dryset brick patio, extending a brick landing along the full back edge of the newly built steps.
Resurfacing a deck can be a cost effective way to upgrade your deck without the complete cost of building a deck from scratch. But not every deck is a worthy candidate for resurfacing. In this case we were able to determine in advance that the existing framing was in viable condition, and that we would be able to amend the joist spacing as described above.
Depending on the condition of your deck, it may or may not be cost effective to resurface the deck or tear it down and start over. But in this case, it was certainly an effective solution.
If you're thinking about an upgrade to your existing deck, let us know and we'll be happy to offer a free analysis.


 RSS Feed